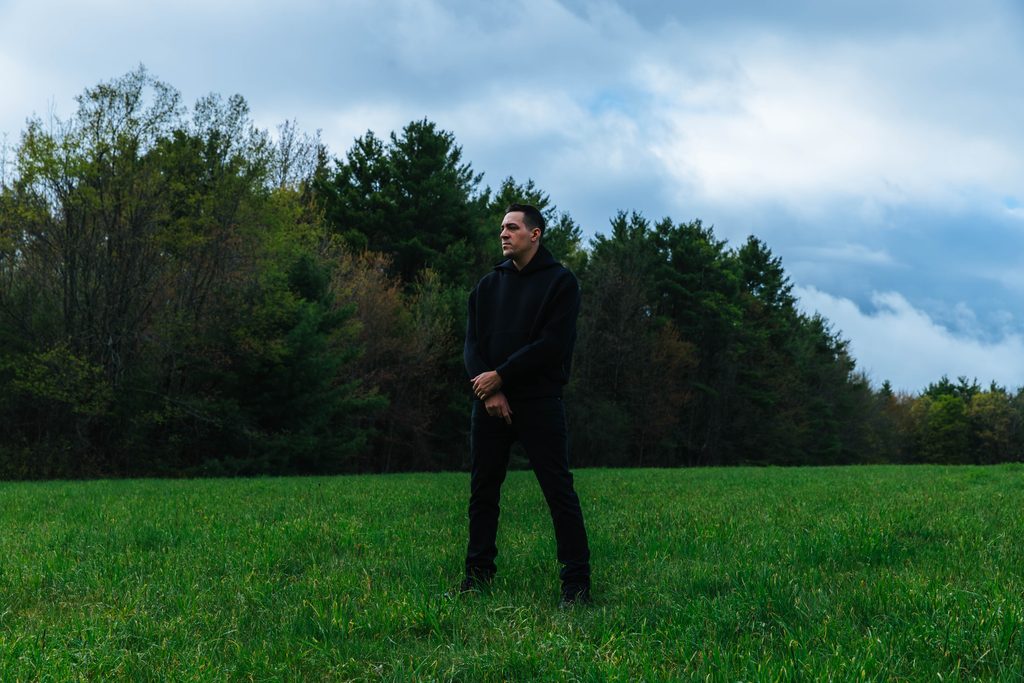
D1RT TH13F is a new electronic project from the Belfast-born, Mexico City-based artist Nico Allard, following more than two decades making records across indie rock, folk, pop and soundtrack work. Drawing on influences spanning West African music, Latin rhythms, post-punk and ambient music, Allard approaches house from the perspective of a songwriter and instrumentalist rather than a genre purist.
That background comes through clearly on new single Hold On. Sparse percussion and understated melodic details give the track a spacious, hypnotic quality, while its bass provides the physical weight underneath. The result sits comfortably in deep house territory while retaining the cinematic atmosphere and songwriting instincts at the heart of D1RT TH13F.
With the single out now, we go on a deep dive on the production behind this D1RT TH13F jam.
The Session – Ableton + LUNA
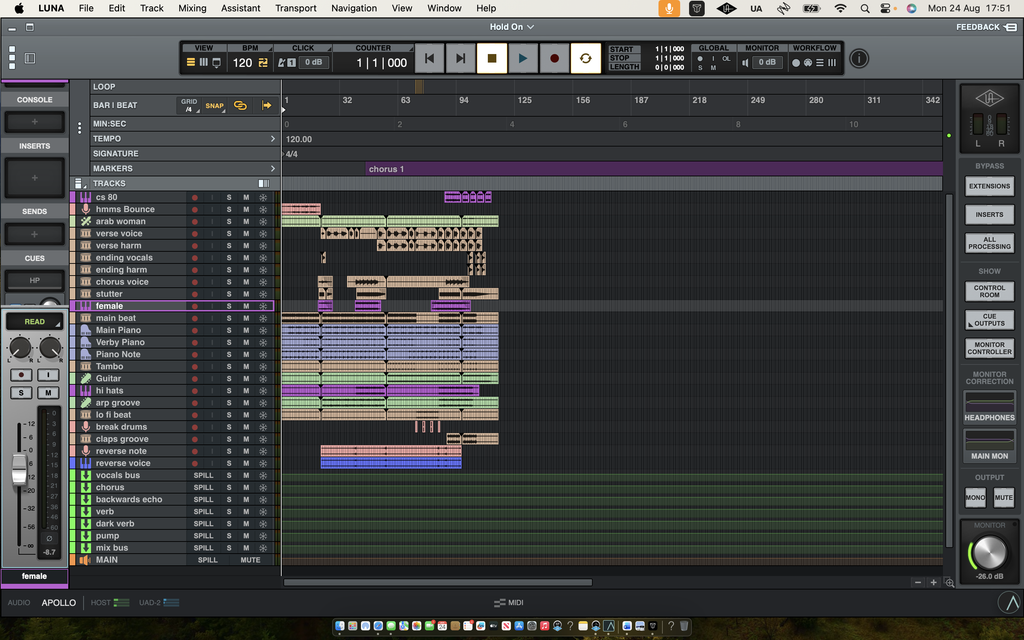
I started the demo in Ableton. I find Ableton really good for chopping loops, moving things around quickly and building a groove. Once I had that working, I moved into LUNA for most of the melodic parts and the more human elements of the track.
That split makes sense to me. Ableton is really fast for constructing the rhythmic framework, but once I’m thinking more about piano, vocals, guitars, synth parts and the overall feel of the record, I’m much more comfortable in LUNA. I come from the analogue tape world, so I still tend to think in terms of tracking, committing to sounds and making decisions as I go.
I also bounce things fairly early. Part of that probably comes from tape, where committing to a sound was just part of making a record. Once I’ve got something doing what I want, I’m generally happy to print it and move on. I find that having too many choices open all the way to the end can become distracting.
A lot of the groove came together before I was thinking about individual sounds too much. I chopped and moved loops around in Ableton until the rhythm felt right, then started adding the more human parts in LUNA. I tend to think of percussion less as a fixed drum pattern and more as a group of parts rubbing against each other. If everything lands too perfectly, I usually start taking some of that precision back out.
The arrangement itself is fairly repetitive, but that’s intentional. A lot of the movement comes from things entering and disappearing, changes in ambience, percussion, stereo movement and small changes in texture. I like repetition when it slowly changes underneath you rather than announcing every transition.
The Piano
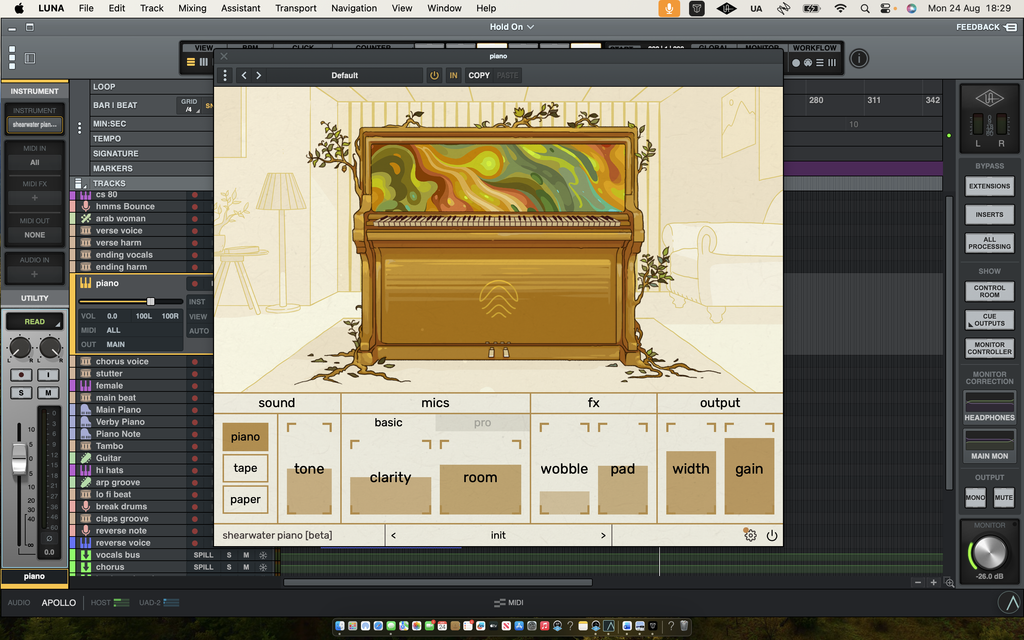
The piano is really the harmonic anchor of the track. It actually came from a slightly obscure beta piano plugin rather than one of the usual big piano libraries. I liked it because it wasn’t completely pristine – there was something a little odd about the tone that sat better with the track than a really polished concert piano.
Most of the synth parts are really there to add colour and movement around the piano rather than replace it. That was important to me because I still tend to hear harmony in a fairly songwriter-ish way, even when the record itself is built around a house groove.
Arturia CS-80 V
The CS-80 is obviously based on the Yamaha CS-80, and it’s one of those synths that can become enormous very quickly. What I like about it is that it never feels completely static. Even when you’re playing something pretty simple there’s a bit of movement and instability to the sound, which makes it feel more human to me.
The CS-80 doesn’t actually appear until fairly late in “Hold On.” The piano has already done most of the harmonic work by that point, and then this little lead groove comes in near the end. It’s not really meant to be a huge lead-synth moment. It’s repetitive and quite simple, but because that sound hasn’t been in the record before, suddenly the track feels like it’s gone somewhere new.
I’m generally more interested in when a sound appears than in making the sound itself incredibly complicated. With something like a CS-80 it’s very easy to keep adding modulation and making the patch bigger and bigger. I’d rather have a fairly simple sound and hold it back until it actually means something in the arrangement.
Soundtoys PanMan
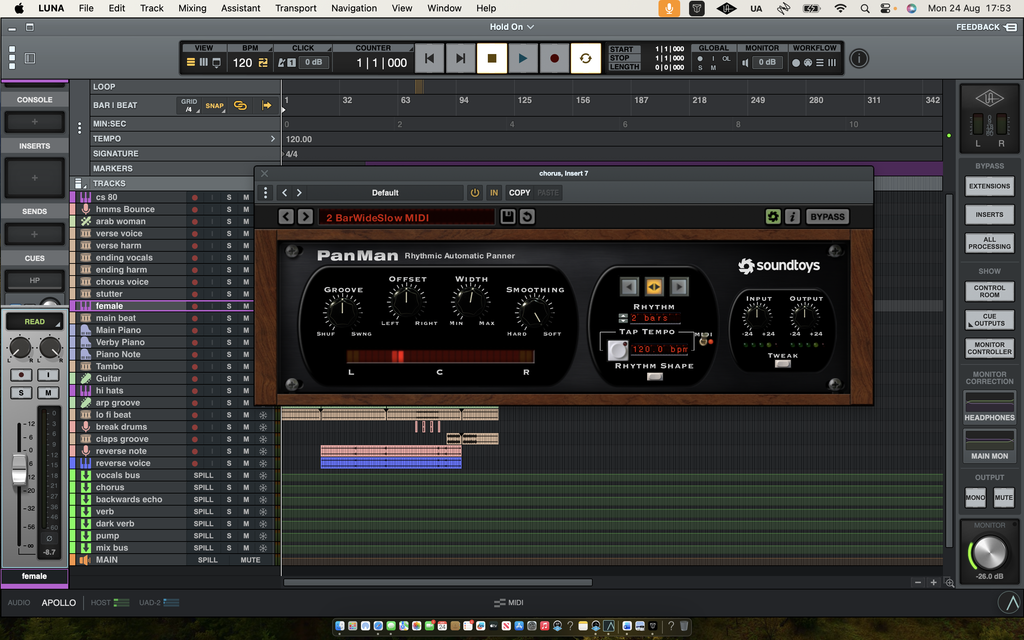
PanMan is basically an automatic panner, although it can get considerably stranger than that if you want it to. I mostly use it because you can make stereo movement feel connected to the rhythm instead of sounding like somebody just automated a pan knob.
On the chorus of “Hold On” I’ve got it moving over two bars at 120 BPM. I wanted that section to feel like it opened up, but I didn’t necessarily want to add another instrument just to make the chorus bigger. The movement is slow enough that I don’t think you really hear it as “here comes the panning effect.” It just makes the section feel a little wider and less fixed.
I think slow modulation is often more useful in house music than people give it credit for. If something is flying left and right every eighth note, you immediately notice the effect. Over one or two bars it can become almost subconscious. You get movement without the effect itself becoming the most interesting thing in the mix.
UAD Studer A800
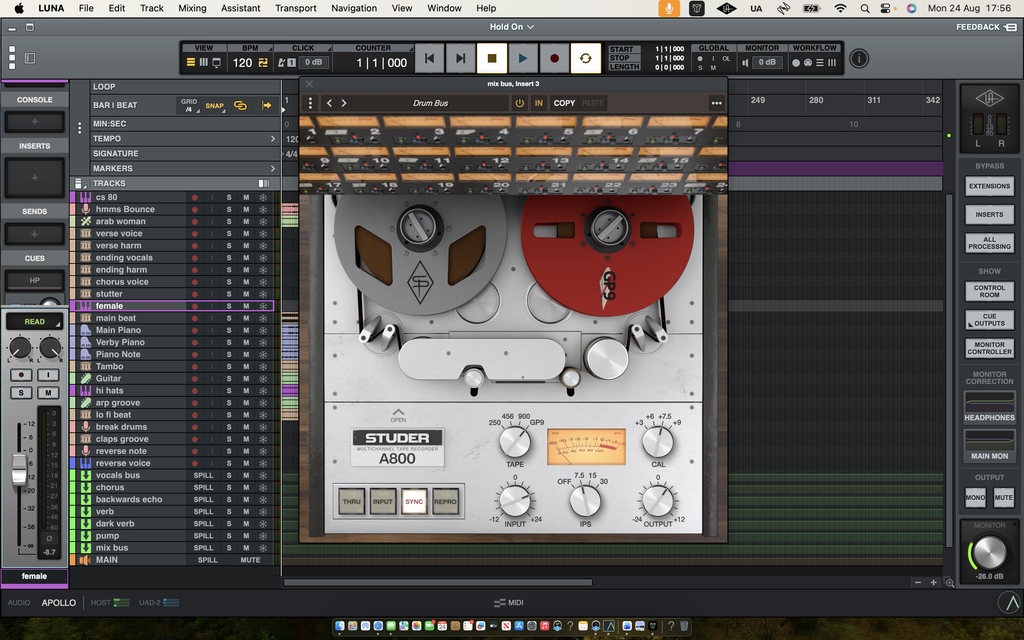
The Studer is probably one of the places where my background with analogue tape shows up most clearly. I spent a long time working in a world where tape wasn’t a flavour you added later, it was simply part of the recording process. So when I use tape emulation now, I’m not really chasing some exaggerated “vintage” sound. I’m looking for the small things tape naturally used to do – a little compression, some saturation, slightly softer transients and a sense that separate sounds belong together.
I used the Studer on the drum bus on “Hold On.” There are a lot of individual percussion elements in the track and I didn’t want them to sound like a bunch of samples sitting next to each other. Running the bus through the Studer gives them some common texture and takes some of the digital edge off without making the drums sound obviously distorted.
I’m usually fairly conservative with tape plugins, probably because I know what actual tape does and, just as importantly, what it doesn’t do. It’s easy to put a tape plugin on everything and convince yourself you’ve made a record sound analogue when you’ve really just made it darker and more saturated. I tend to like a little on groups or buses and let the cumulative effect do the work.
UAD Lexicon 224
The Lexicon 224 is a very particular kind of reverb. It doesn’t really sound like a perfect physical space, and I don’t think that’s the point. It has this slightly dark, artificial character that I really like because it becomes part of the sound rather than just creating the illusion that something was recorded in a room.
I have a separate return in the session literally called “dark verb,” and that’s where the 224 is sitting. There are brighter spaces elsewhere in the track, so I wanted something that could push certain things backwards and give them a different depth without just turning them down. It’s more about having layers of space than putting one reverb across the entire record.
That’s probably the main thing I’ve learned with reverb. I don’t really think in terms of finding one perfect reverb anymore. I’d rather have a couple of spaces doing different jobs. Something short or bright can keep an element fairly close, while a darker reverb can make another sound feel several feet behind it even if they’re technically sitting at similar levels.
ValhallaRoom
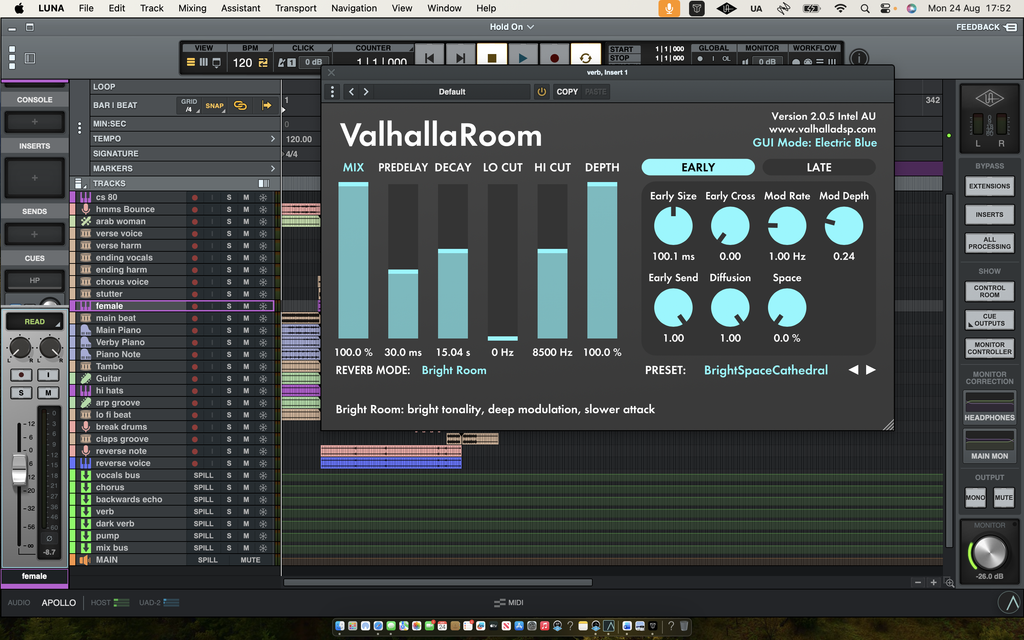
ValhallaRoom is one of those plugins where you can make something fairly realistic if you want to, but you can also make spaces that obviously have nothing to do with an actual room. I tend to like the second option. I’m not usually trying to convince somebody that the music was recorded inside a cathedral.
The setting I used here is extremely long – around fifteen seconds – with some pre-delay. That sounds ridiculous on paper, but it’s on a send and I’m feeding relatively small amounts into it. So rather than hearing this massive fifteen-second tail covering everything, you get this sort of atmosphere hanging behind the track.
I think really long reverb gets a bad reputation because people tend to use too much of it. A fifteen-second reverb can actually be quite subtle if you barely send anything into it. The decay time isn’t necessarily the problem. Usually the problem is how much information you’re putting into the reverb in the first place.
API Vocal Chain
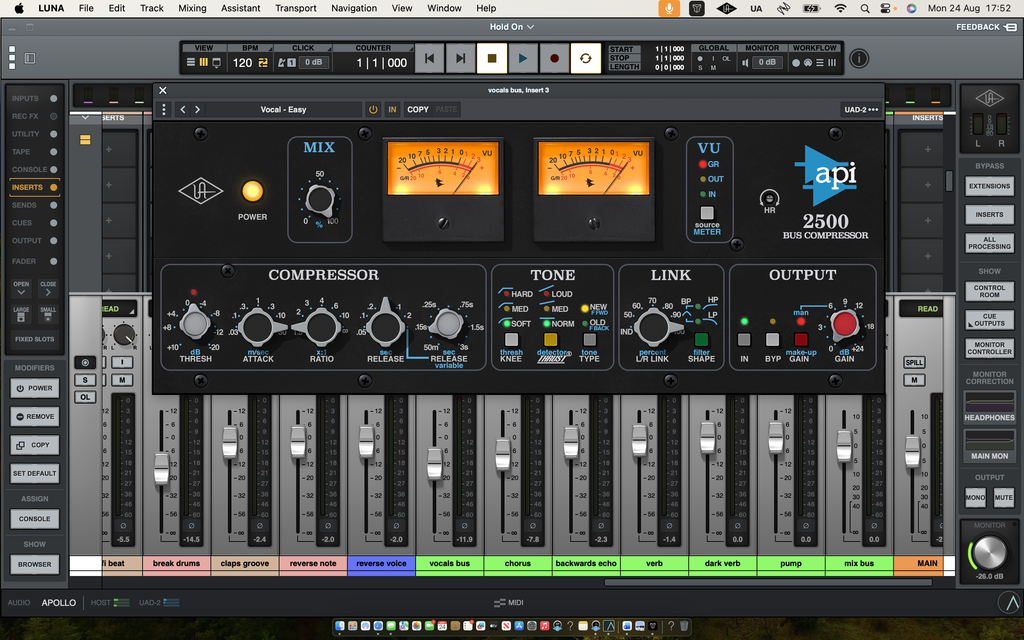
The API stuff has a very direct sound to me. It can be punchy and quite forward, but you don’t necessarily have to use it aggressively. I like having something on a bus that gives the vocals a common character without making the compression itself really obvious.
There are several vocal elements and treatments in “Hold On,” so I’m using the API chain to bring some of those pieces together once they reach the vocal bus. I’m not looking for a really exaggerated compressed vocal sound. It’s more that the different vocal pieces start behaving like one thing rather than feeling like separate tracks that happen to be playing at the same time.
I’m not especially interested in hitting some predetermined amount of gain reduction. I think that’s one of those things people can get hung up on when they start mixing – you read that a bus compressor is supposed to be doing two or three dB, so you make it do two or three dB. If it sounds better doing less, then less is probably the correct amount.
Soundtoys Sie-Q

Sie-Q is almost comically simple compared to a lot of modern EQs, which is exactly why I like it. There’s no giant analyser showing you every tiny thing that might theoretically be wrong. You’ve basically got a few broad tonal choices and some drive, so you have to use your ears.
On this track I used it as part of a more filtered vocal treatment. I wanted some of the vocals to get smaller and more limited in frequency rather than having everything sound huge all the time. That gives you somewhere to go when the fuller vocal comes back in.
I use EQ creatively quite a lot. Removing information can be just as useful as adding something. Especially in electronic music, where there can be a lot happening in a fairly narrow rhythmic space, sometimes making one element deliberately thin or small is exactly what allows the whole thing to feel bigger.
Neve Summing
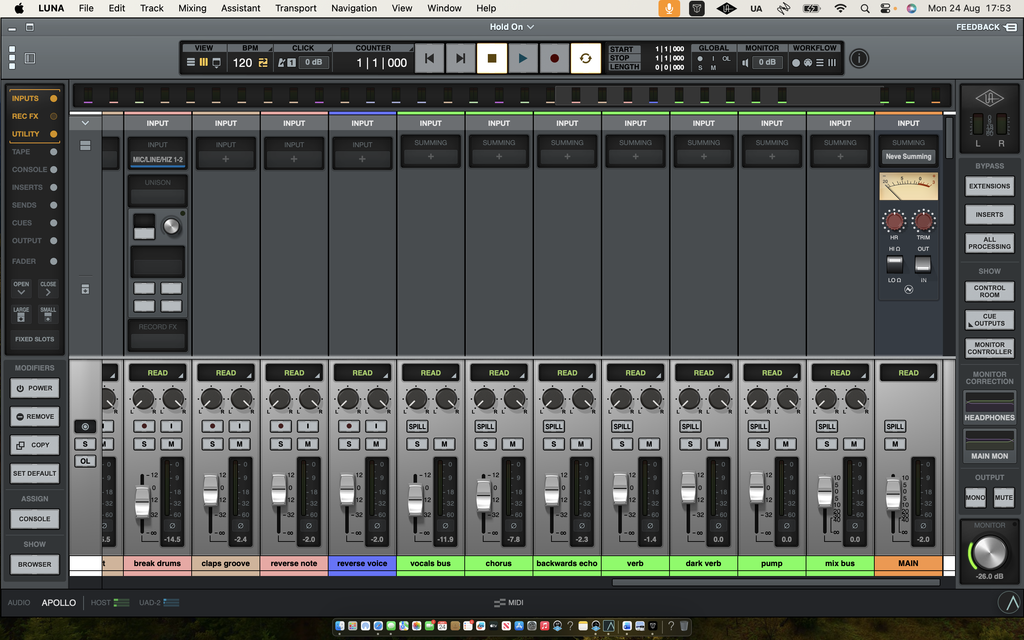
One of the reasons I like working in LUNA is that the console side of making a record is built into the environment. Coming from analogue tape and consoles, that feels more natural to me than treating every stage of the recording as a completely separate digital process. The Neve summing isn’t some magic button that suddenly makes everything sound like it came out of a studio in 1973, but it does add a little bit of character and interaction to the mix.
I’m using it as part of the overall architecture of “Hold On,” rather than as a special effect on one particular instrument. A lot of the record was made from digital sources, so I like having small amounts of saturation, tape, summing and slightly imperfect effects happening at different stages.
I don’t really believe there’s one plugin that makes something sound “analogue.” To me it’s cumulative. Maybe there’s some tape on the drums, some console character somewhere else, an old digital reverb, a delay that’s slightly dirty. None of those things is dramatic by itself, but eventually they stop the record from feeling completely pristine.
Hold On is out now