Robin Thurston (@robin_thurston) “Equinox” gives Magnetic Magazine Recordings a progressive house release that feels rooted in patience and strong melodic writing, both hallmarks of an expertly made progrssive tune. The track is built around a lead pad from u-he Diva, with the synth also handling the arp and chord parts, which helps explain why the record feels so unified across its full arrangement.
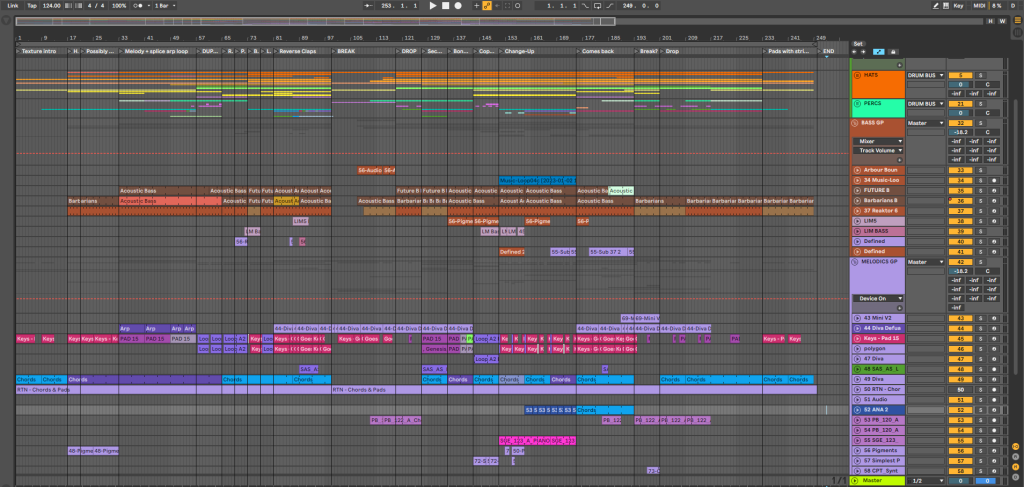
Rather than stacking the session with disconnected ideas, Thurston keeps the focus on a few central parts and lets them develop with purpose and that restraint is a big part of what makes this breakdown so interesting for producers and artists to check out. Thurston walks through how he used Diva presets as starting points, then shaped them with decay, release, filter movement, Guitar Rig processing, and a drier Knifonium layer to keep the main melody present in the mix.
It is a practical reminder that progressive house production often comes down to choosing the right part early, then using automation and layering to make that idea carry through the track.
In this How It Was Made feature, Thurston breaks down the tools behind “Equinox,” including Native Instruments Guitar Rig, FabFilter Saturn, and Soundtoys Crystallizer, while also sharing quick production tips for writing in this genre.
And I think the coolest part of the whole thing is how grounded the advice feels. He talks about call-and-response, bass layering, sound selection, studio focus, and the importance of making music you would want to hear in a club, which makes the feature useful for producers looking to finish cleaner, more focused progressive house records.
u-he Diva
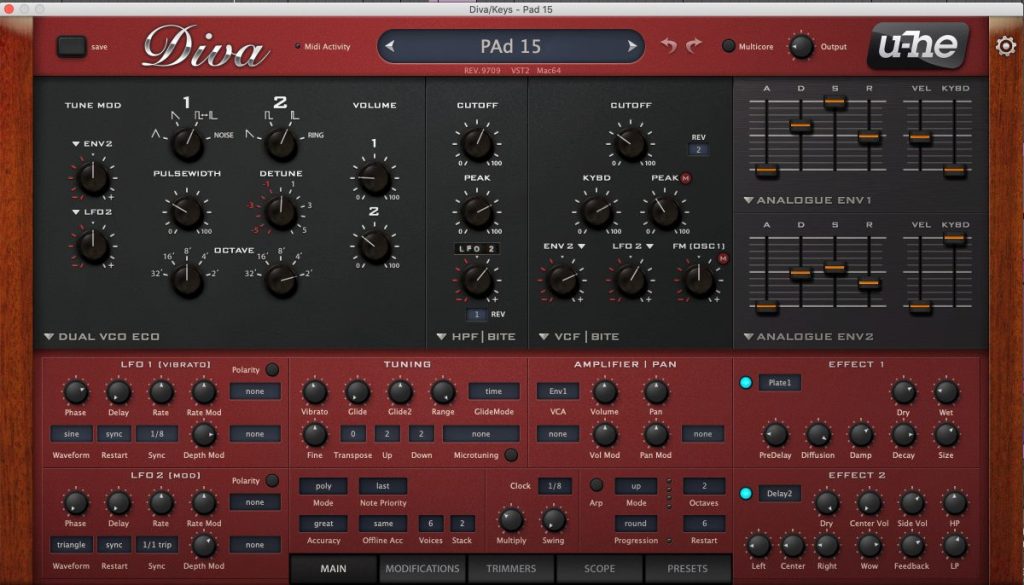
On this particular track, the key VST used – certainly in terms of the melodic content – was u-he’s Diva. A real powerhouse of a synth with great versatility. In this case I’ve used it for the pad lead melody, the arp and the chords. It’s one of those synths that can be used for just about anything, for example, in other tracks I’ve used it more for bass.
In ‘Equinox’ I’ve used a number of Diva presets – adapted and tweaked to taste – from a D-Nox & Beckers preset pack that was included as part of an online course I bought from them a few years ago. The pad lead came first, going for a nice dreamy feel. The part actually evolves quite a lot across the track in terms of the notes it plays – some higher up, others lower down – and that’s one of the main ways the sound develops. There isn’t a great deal of automation on the synth itself, other than playing with the decay and release at certain points as the track progresses. This is also supported by some subtle filter automation using Ableton’s Auto Filter.
As well as the delay and reverb added in the synth itself, it then gets a drenching in reverb from one of my favourite presets in Native Instruments’ Guitar Rig, which I automated throughout. Because of the amount of reverb on that part though, I chose to layer in another more upfront, drier element playing the same notes. For that I used Knif Audio’s Knifonium – a cool plugin for leads which I picked up from Plugin Alliance a few years ago. I’ve also used Diva in the track for the chord stabs and the high-end arp – two more backing elements that remain pretty consistent throughout but help to give the track its vibe.
I’d recommend other producers have a play and get experimental with it. The interface is intuitive enough for making your own sounds, and there are plenty of good preset packs out there too – but the more you can tweak them to fit your own style, the more unique your tracks will end up sounding.
Native Instruments Guitar Rig
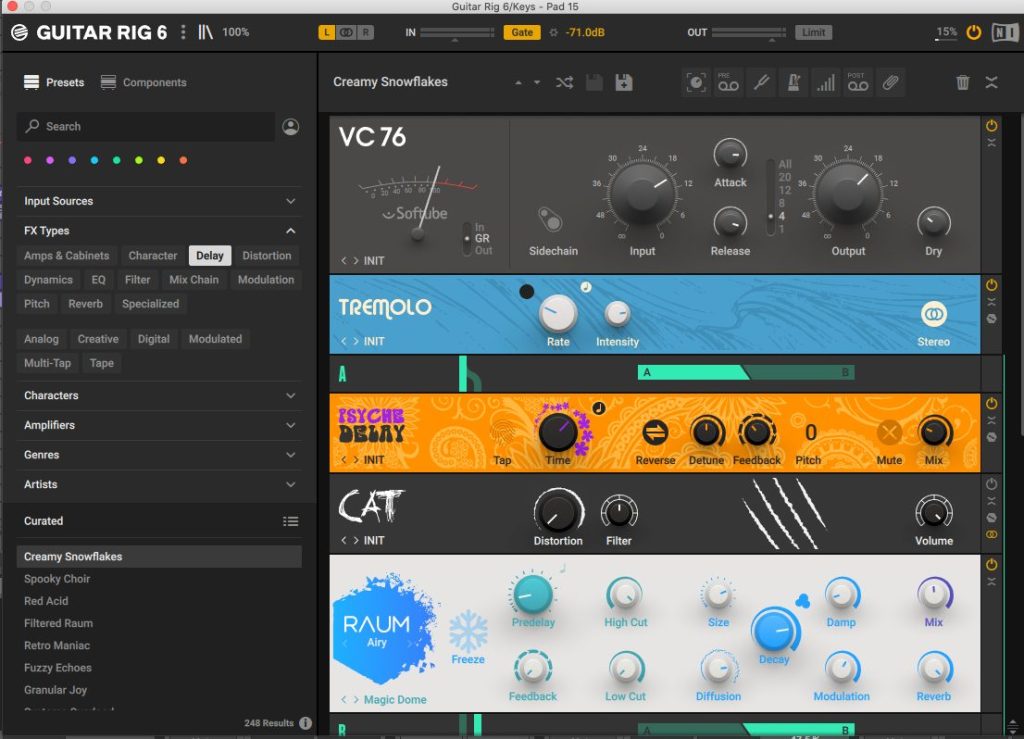
An important creative plugin I’ve used here is Native Instruments’ Guitar Rig – essentially a virtual amp and effects rack that’s great for adding extra colour and texture to sounds. Within the plugin you get stacked chains of effects (delays, reverbs, compressors and so on) and on this track I’ve gone for a preset categorised as a delay FX type but which actually contains all of these. Here I used the ‘Creamy Snowflakes’ preset to add more lushness to the Diva pad lead sound, and within this I’ve automated the Raum reverb mix throughout the track. Raum is also available from Native Instruments as a separate standalone reverb.
How I use it may not be the most intentional of processes but trying out different chains can really elevate a sound into something with more excitement and movement. If something sounds good it can really transform the vibe of an element – and indeed the whole track – and it’s a really useful creative tool to automate. The discipline is to use with a level of restraint as too much wet signal can cause issues later in the mix. You can, however, turn certain effects in the rack off to tone things down, or you might want to put it on a return track or create a chain in the channel so you can use it more sparingly. Although not used on this track, I often find myself reaching these days for plugins like Output’s Portal or DS Audio’s Tantra from Plugin Alliance to do similar things – really messing with the original sound in creative ways.
FabFilter Saturn

FabFilter Saturn is one of my go-to saturation plugins (along with Soundtoys Decapitator). It’s a multiband saturation and distortion plugin that can be used for both mixing and sound design. With it you can split an audio signal into multiple frequency bands and apply different types of saturation or distortion to each band independently – very useful for extra control. It offers a range of distortion models inspired by tubes, tape, transformers and guitar amps, plus a handful of more creative FX styles, with per-band feedback, dynamics, drive, tone and modulation options.
I’ve used it here on the chord stabs to make them a bit fuller and warmer. AB’ing with the dry signal, the stabs sounded a bit thin without it. In this case I used the ‘Lightly Driven Saturator’ preset, which does exactly what it says on the tin – nothing too over the top, but very definitely making a subtle yet important difference.
You can play around with the drive settings and set bands for where you want the most saturation to occur. This is how I tend to use it – in a fairly simple, light and subtle way. However, there’s a lot more under the hood too – LFOs, envelope followers and so on – and if you want to go down that rabbit hole, you can modulate pretty much any parameter, which makes it just as much a sound design tool as a mixing one.
Soundtoys Crystallizer
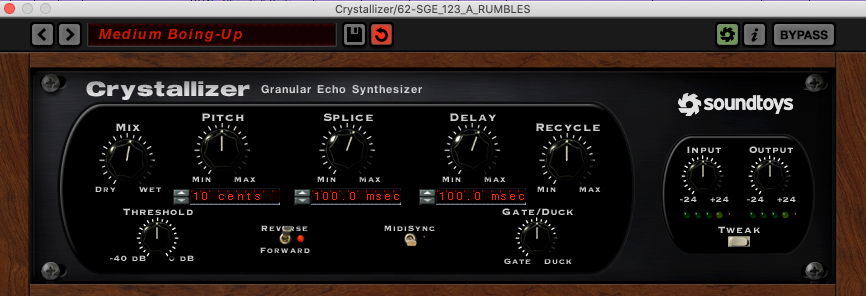
Soundtoys’ Crystallizer is a really cool creative effects plugin that can be used to transform sounds into something more unique, shimmering and textured. It uses a combination of pitch shifting and granular echo effects and is based on the ‘Reverse Shift’ algorithm from the Eventide H3000, a classic hardware multi-effects processor.
In and around the breakdowns I added some additional melodic pad layers to give the track a bit more depth. I used a couple of samples from loop packs for this, but then developed one of the sounds further through Crystallizer’s ‘Medium Boing-Up’ preset – essentially an echo pitch effect with the wet/dry mix sitting at around 50%. With this added to the channel strip, it transforms the sound into something more complex and textural with more emotional depth.
As this additional pad layer plays for a relatively short time in the context of the whole track, I haven’t done a great deal of automation within the plugin itself. There is some automation of the filter cutoff with Ableton’s Auto Filter though, and there’s also a spot where I pitch the sample up an octave to give the track a lift when some of the other elements kick back in shortly after the main break.
I tend to reach for it mostly on pads, but it could just as easily be used on other elements such as risers, vocal stabs and drum tails. Have a play and see what you can get away with – for me it’s more a plugin to use sparingly in a few select places, either on the channel or a send, often as an automation tool to spruce a sound up. This may be as simple as automating the wet/dry mix, but you can automate things like the recycle parameter (which feeds the effect back on itself) or the pitch interval. A common pitfall is that it can be tempting to overuse these sorts of granular effects. While it often sounds great in isolation, it can pull focus from a lead – and fundamentally, what makes a track strong is good sound selection in the main melodic elements to start with. It’s really a few key elements that do the heavy lifting in carrying a track.
Finally, the three creative FX plugins I’ve chosen to pick out in this track breakdown are by no means an exhaustive list – other delay and reverb plugins used on this track included Soundtoys EchoBoy, Native Instruments Replika, Valhalla Supermassive and Valhalla VintageVerb.
Quick Fire Tips For Making This Genre
Tip #1 Build in plenty of call and response – let the elements talk to each other. It’s what keeps a groove hooky instead of boring.
Tip #2 Layer up your bass to shape the groove – the interplay between elements, mid-bass especially, stops the bassline going static. Just don’t overcook it; there’s a fine line before it sounds cluttered.
Tip #3 Every element should earn its place. I’ve been guilty of cramming in too many (still am, if I’m honest) – so mute it and ask: is it missed? Coming back days or weeks later makes the answer clearer.
Tip #4 Produce when you’re fresh and guard against distractions. Learn to spot when fatigue sets in and you’re hitting diminishing returns – knowing when to step away is a skill that comes with time.

Tip #5 Land on a melodic hook early – keep regular studio jams going where you’re free to throw ideas around. For me, a memorable lead line is what makes a track stand out, and it isn’t just the notes – the sound you choose is half of what makes it stay with you.
Tip #6 Make music for yourself – the music you’d want to hear in a club. That authenticity shines through, and over time it’s how you cut through in a saturated market.
Will Vance is a professional music producer who has been involved in the industry for the better part of a decade and has been the managing editor at Magnetic Magazine since mid-2022. In that time period, he has published thousands of articles on music production, industry think pieces and educational articles about the music industry. Over the last decade as a professional music producer, Will Vance has also ran multiple successful and highly respected record labels in the industry, including Where The Heart Is Records as well as having launched a new label with a focus on community through Magnetic Magazine. When not running these labels or producing his own music, Vance is likely writing for other top industry sites like Waves or the Hyperbits Masterclass or working on his upcoming book on mindfulness in music production. On the rare chance he's not thinking about music production, he's probably running a game of Dungeons and Dragons with his friends which he has been the dungeon master for for many years.