Table of Contents
Sound design can be detailed and simple at the same time, and that choice stays in your hands the whole time. If you are learning a DAW and learning production at the same time, you do not need to copy what advanced producers do on day one. You can start with small moves that change the result fast, and you can build from there as your ears and your workflow catch up.
I also think sound design gets framed as this intimidating specialty, and that framing throws people off. In practice, shaping a sound can be one of the most beginner-friendly parts of production because the feedback loop is immediate. You turn a knob, you hear what has changed, and you start to understand what the tool does in real terms.
So, in this Reason 13 guide, which LANDR was kind enough to be the sponsor of, I’m going to define what sound design should mean for a producer who is still getting comfortable in a DAW. Then I’ll walk through a starter workflow for designing and shaping sounds so they fit the track you are building. We’ll start with samples and preset selection, then I’ll call out the parameters that usually matter first when you want a sound to sit correctly, then we’ll get into layering two sounds so they function as one part with a clear role.
After that, I’ll cover a few effective moves you can lean on for polish and mix fit, so you can get results fast without turning the process into a technical project.
Why Picking A Sound To Start Writing With Isn’t That Complicated
When you’re just getting started with Reason (or any new DAW really), and especially when you’re starting a new track in that DAW, I like to keep the goal simple. I want an inspiring sound in front of me as fast as possible, and the easiest way to do that is to start with presets.
Many new producers assume they have to design every sound from scratch right away, which tends to slow the whole process down. In reality, one of the best ways to learn sound design is to start with the professional presets that ship with your DAW, then begin nudging them into your own lane. Reason makes this pretty easy because its stock instruments include many presets that already feel track-ready.

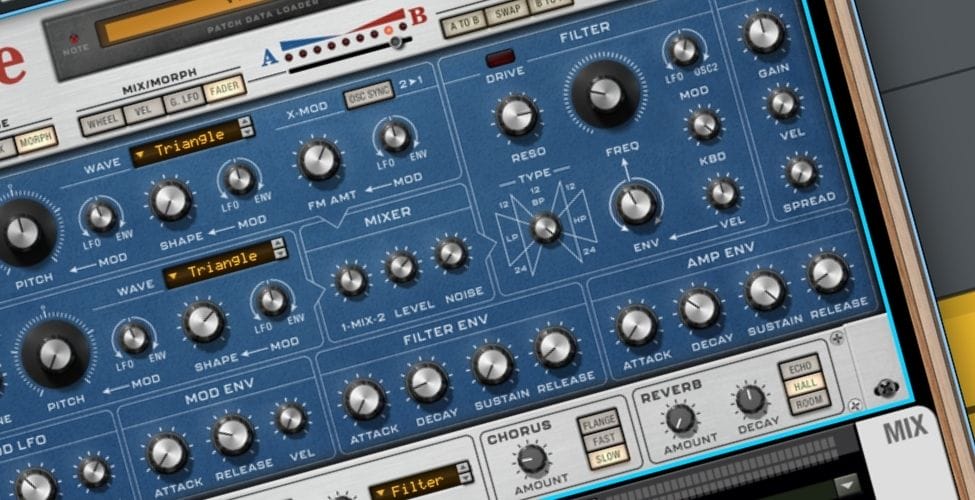
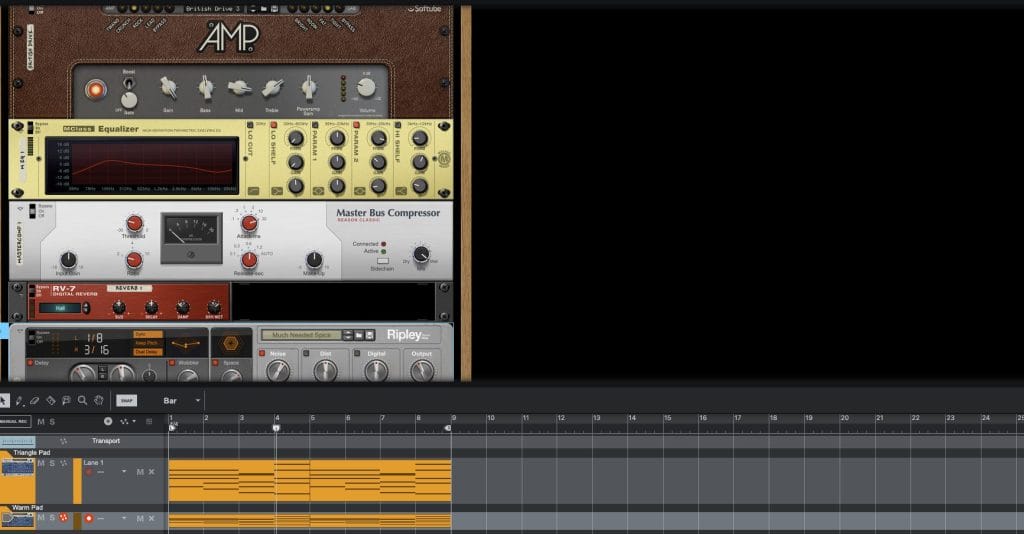
For this example, I spent a few minutes scrolling and landed on the Triangle Pad preset in the Polytone Dual Layer Synth and played a quick 8 bar loop with it (the audio of the preset and the MIDI linked below) but it’s important to stress that these exact same moves can be done on literally any synth; every synth has envelopes and filters which is the lion’s share of what we’ll be tweaking and adjusting as we go over the basics.
I also tend to start tracks with chords for a practical reason. A pad playing a chord progression gives you a harmonic framework that everything else can reference. Once those sustained notes are in place, it becomes much easier to write melodies, build arps, and make arrangement decisions, because you have a clear musical center to write around.
Pads also take up a lot of space, so they influence the track early in a way that forces useful decisions. Mix details are outside the scope here, but the point still matters. Sustained chords shape the composition, and they end up shaping the mix footprint too, which is another reason I like starting there.
And in this case, that Triangle Pad had the kind of tone that made me want to keep writing. That’s the real priority when you’re learning Reason 13 or any DAW. Get to a sound that pulls you forward, then use that momentum to learn how to shape it.
Making Our First Adjustments
Once the preset patch gets me started and gets me into the creative process, I start thinking about what I want to change once the chords are laid down and I want to actually start sound designing and sculpting the sound.
For me, the biggest factor affecting the overall shape, tone, and immediate vibe is the filter, then the envelopes, then the waveforms. A lot of early sound design in Reason lives right there, and once you get comfortable with those parameters, you can take a preset and move it toward your track fast.
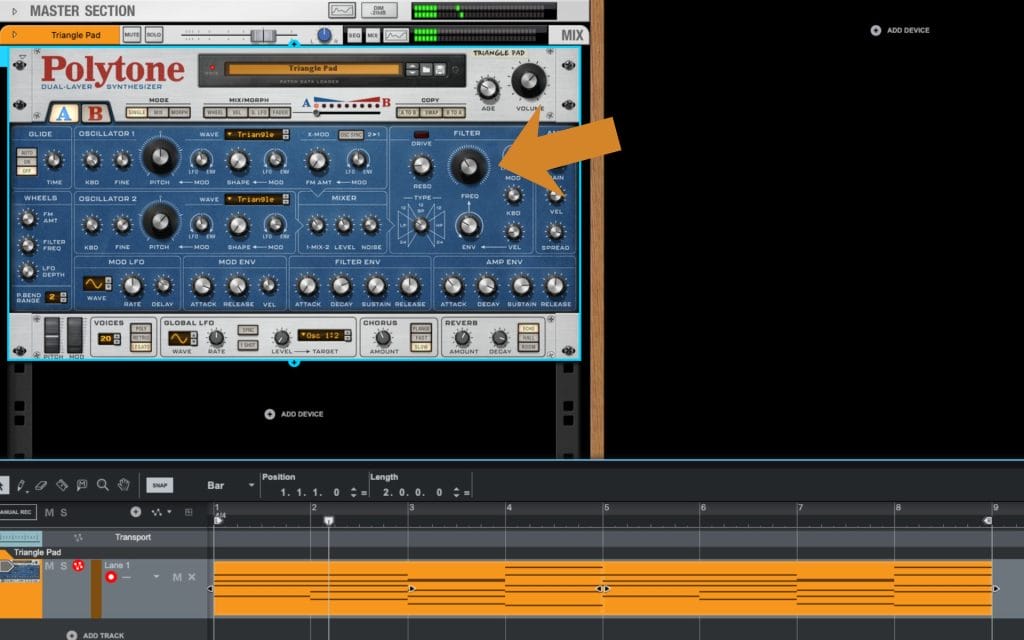
The filter is going to define how bright the sound feels. If it feels like it has too much top end for the role it needs to play, the filter gives you a direct way to pull that back, and the filter envelope lets you decide how that brightness changes over time.
Then the amp envelopes come in. Those are about how the volume changes over time, so attack and sustain end up being the first things I touch. That defines how fast the sound ramps up to full volume, how it holds while the chord sits there, and how it trails off after.
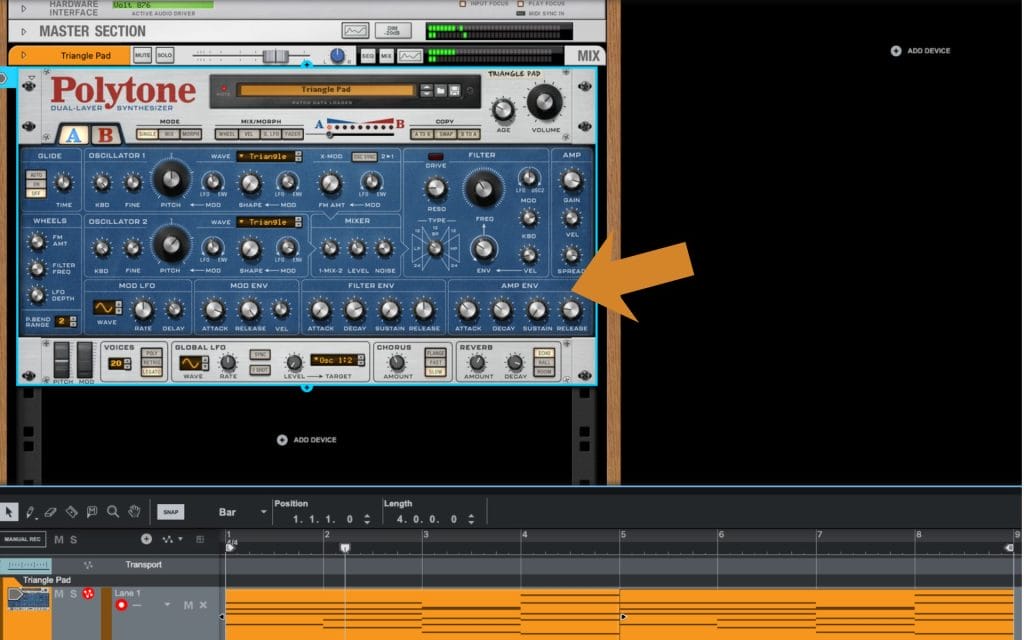
Notice how pulling down the sustain (how loud the sound is after it reaches its initial peak) and the decay (which tells the synth how long it takes for the sound to shift from its max volume to the sustained volume) turns the long and drawn-out pads into some a bit more rythmic and shorter? I like that sound, as I think it gives me more room to add an extra synth lead or something in the next stages of the production when I want to start adding a few more bits and bobs.
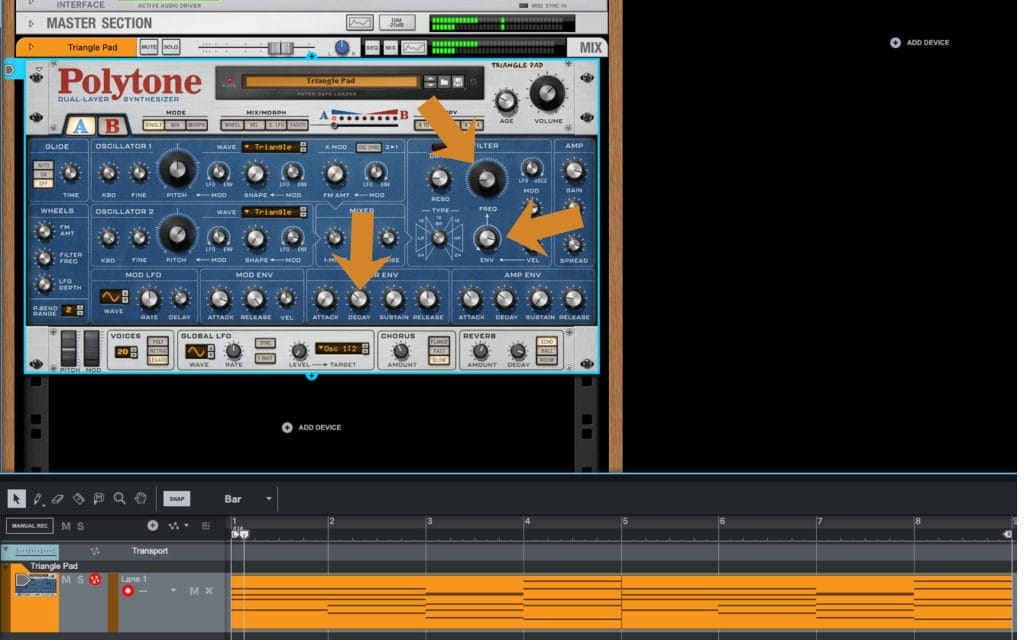
Next, you’ll notice I did similar tweaks on the filter envelope. I tightened up how the filter moves over time, and I also increased the amount that the filter envelope opens up.
What that did was give me a brighter initial sound right at the front of the note, introducing a little extra brightness in the early part of the sound and giving the patch more life. It also helped it cut through the mix a bit better, and it gave it a little extra attitude so it could actually anchor the composition. Before that, I felt like it was a little too quiet and a little too subtle, and early on I wanted this to act as that foundational harmonic framework for the rest of the track, so I wanted it to pop out a bit more.
And you can already hear it. In two or three quick change points, it went from a long, wavy synth into something closer to a floaty pluck. That’s after changing maybe four or five parameters, and it took about five minutes of tweaks.
Waveforms matter too because they define the overall timbre of the sound, and that topic can easily become its own article, so I’m keeping it focused here. Notice how changing the waveform from a triangle wave to a saw tooth wave introduces even more brightness and crispiness? That’s something that I actually really like, as it moves the sounda bit further away from the flute-like quality described above and into something a bit more digital, which is exactly what I’m after.
So right now, I’m going to start tapering back the main core things. I’m going to work with the filter itself, then the ADSR on the filter, then the ADSR on the amplitude. What I like about this patch is the soft, ambient, mellow vibe, and I want to keep the qualities that drew me to it in the first place. I also want less brightness so it fits the foundational vibe I’m going for with the track I’m working on.
Layering As Sound Design
Music production, and honestly every part of it, mixing, arrangement, sound design, it all comes down to making intentional choices so parts do not blur together. That same idea shows up in layering. Layering sits inside sound design in the same way tweaking parameters on one synth sits inside sound design, because you are still shaping the final sound that ends up in the track.
When layering gets done right, you can pair two synthesizers together and end up with a combined sound that feels stronger than either patch on its own, and that only happens when you do it with intention. A lot of newer producers in a DAW like Reason 13 try to layer, and they end up muddying the mix, overcomplicating the part, and the whole thing falls apart, and it usually comes down to user error and a lack of a plan.
So let’s talk about layering really quickly.
My main approach is this. You start with your core sound, in this case it’s the patch we’ve been building for the past section, and then I run a quick internal dialogue. I ask myself, what do I like most about this sound right now. For me, I like the attack and the brightness that the saw-wave change introduced. Then I ask, what does this sound not have. It can be missing warmth, and it can be missing that texture that happens after the initial attack and decay, that sense of a tail that hangs around in a useful way.
So when I’m looking for a complementary layer to put next to it, I’m looking for that second supporting layer to do what the first sound does not. The idea is that you have two sounds playing the same MIDI notes simultaneously, and each has a clear role. One gives me that front edge and that brightness, and the other fills in the body and the tail so the overall part feels fuller and more controlled.
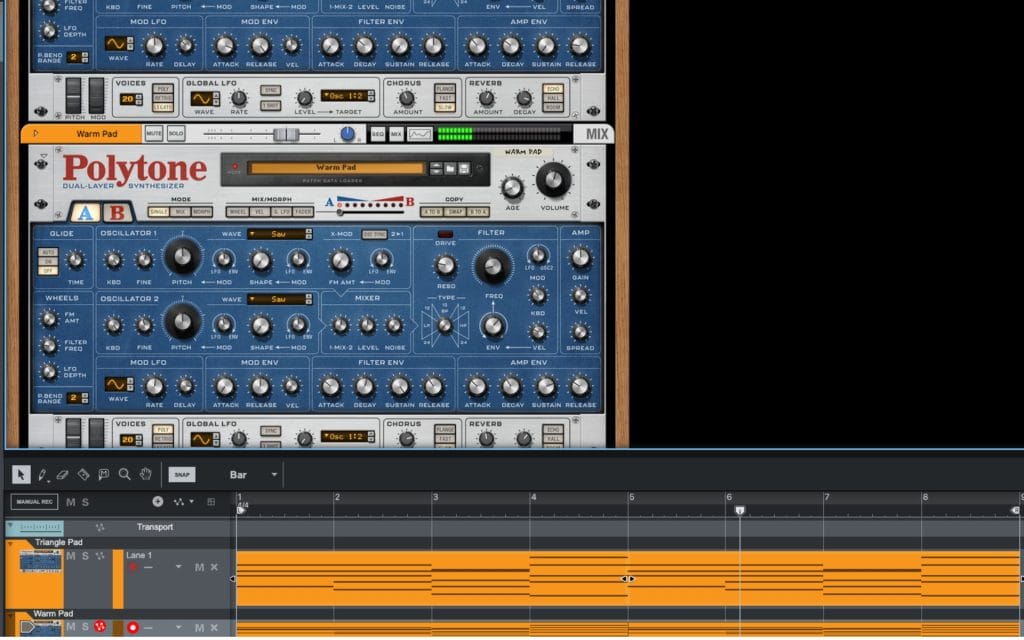
And yes, once you find that second patch, you can make the same tweaks and fine-tune it to dial it in even quicker. I’m not going to go through that same level of detail here because we already did that work on the main one. What I’m going to do next is show you the second sound I picked, and then I’ll play a quick audio example so you can hear how fast this can get you to a finished result when you layer two patches with intention.
Notice how the new chord progression below now has a brighter attack on it but still has a subtle warmth underneath? And also notice how they are working together to still sound like a single, cohesive synth? That’s the magic of layering!
Processing Chains
Once I have the basic sound working, either as the main synth or as an extra layer, this is where processing starts getting fun. A lot of people talk about processing chains like they are mainly surgical EQ moves so a sound sits perfectly in the mix, and that stuff matters, but processing can also be creative.
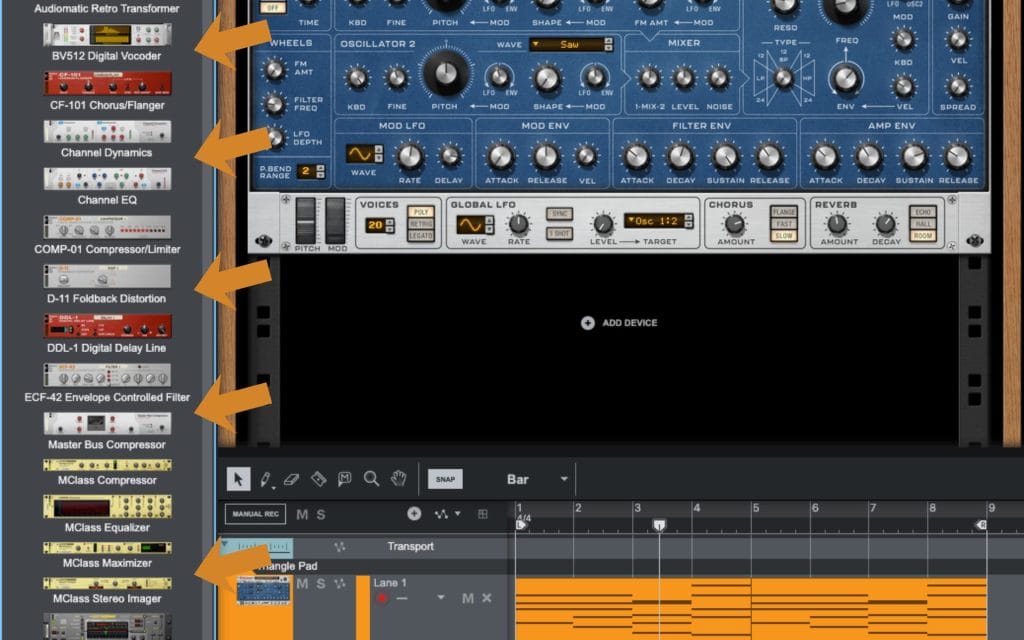
Reason 13 gives you a long list of effects which you can stack into powerful racks (racks are Reason’s big X-Factor compared to its competitors), and I could spend a few thousand words breaking them all down, but I think the fastest learning comes from opening them up and trying them. You can read a hundred articles on what compression does, or the differences between digital compression and analog-emulation styles inside Reason’s effects and VST options, and you’ll still learn faster by actually using the tools. Push settings past what you would use in a finished track so you can clearly hear what each control changes, then pull it back once your ear has the reference.
That said, I do lean on a basic framework when I’m building a chain, mainly because it helps me stay organized when I have a lot of options in front of me.
I usually start with distortion or saturation, because adding harmonics can give the sound extra density and bite, and it can help it feel a little more analog. After that, I do some reductive EQ to remove stuff I do not want, and broad moves can help bracket the sound so the focus stays on the part of the spectrum that matters for that patch. Then I’ll add compression once I’m working with a cleaner frequency range, because I can shape the movement and consistency without reacting to frequencies I already planned to remove. After that, I’ll add a spatial effect like reverb or delay, and then if I want extra motion, I’ll try light modulation like chorus or flanger.
It’s a general framework, and you can break it any time you want, but it helps make sense of the options. Then I go back to the main point. Spend time actually running sounds through these tools, push them to extremes so you learn what they do, and keep experimenting, because a big part of the final result comes from how you process the sound after you build it.
Final Thoughts On Sound Design In Reason 13 (Especially For Beginners)
Sound design in Reason 13 can stay simple, and it can go deeper later. For beginners, I treat presets as the starting point, then I reach for the controls that change the result fast. Start with the filter to set brightness, then shape the amp and filter envelopes so the sound enters and exits the way the part needs. After that, layering can fill in what one patch lacks, as long as each layer has a clear role.
Once the core sound works, try effects in Reason 13 and learn by pushing them, then dialing back.
Keep writing and keep creating.
Frequently Asked Questions
Is Arpeggio Lab included in Reason 13?
Arpeggio Lab is a Player device for the Reason Rack, and access depends on how you own Reason.
In many setups, it shows up with a Reason+ subscription, and it can also be available as a separate add-on purchase. Some perpetual Reason licenses do not include every Rack device by default, so the quickest way to confirm is to check what your account says you own inside Reason Studios.
What is sound design in film?
Sound design in film is the work of creating, editing, and shaping the non-music audio that supports the picture.
That includes sound effects, foley, ambience, dialogue cleanup and editing, and any designed elements that get built from recordings or synthesis. It also includes placing those elements in time with the cut and making choices that help the final mix read clearly.
Who makes Reason DAW?
Reason is developed by Reason Studios.
The company was previously known as Propellerhead Software, and it later rebranded under the Reason name. They build the standalone DAW and the Reason Rack devices.
What happened to Reason DAW?
A lot of the “what happened” conversation comes from changes in how Reason is packaged and used.
The company rebranded from Propellerhead to Reason Studios, then they expanded the platform by offering the Reason Rack as a plug-in you can run inside other DAWs. Around that, they also added a subscription option alongside the traditional license model, so people started seeing more than one way to get the same tools.
Is Reason 13 a DAW?
Yes, Reason 13 is a full DAW, meaning you can write, record, edit, and mix in the standalone application.
On top of that, the Reason Rack can also run as a plug-in inside another DAW, so you can use the instruments and effects in a different host if you prefer. That combo is a big part of how Reason fits into modern workflows.
What is the 35 year rule in music?
In the United States, “35-year rule” usually refers to copyright termination rights for certain grants of rights, where an author can terminate a grant after the required window and timing rules are met. The termination can take effect starting 35 years after the grant, and it involves strict notice requirements.
There are major exceptions, including work made for hire, so it is worth checking the details for the specific deal before assuming it applies.
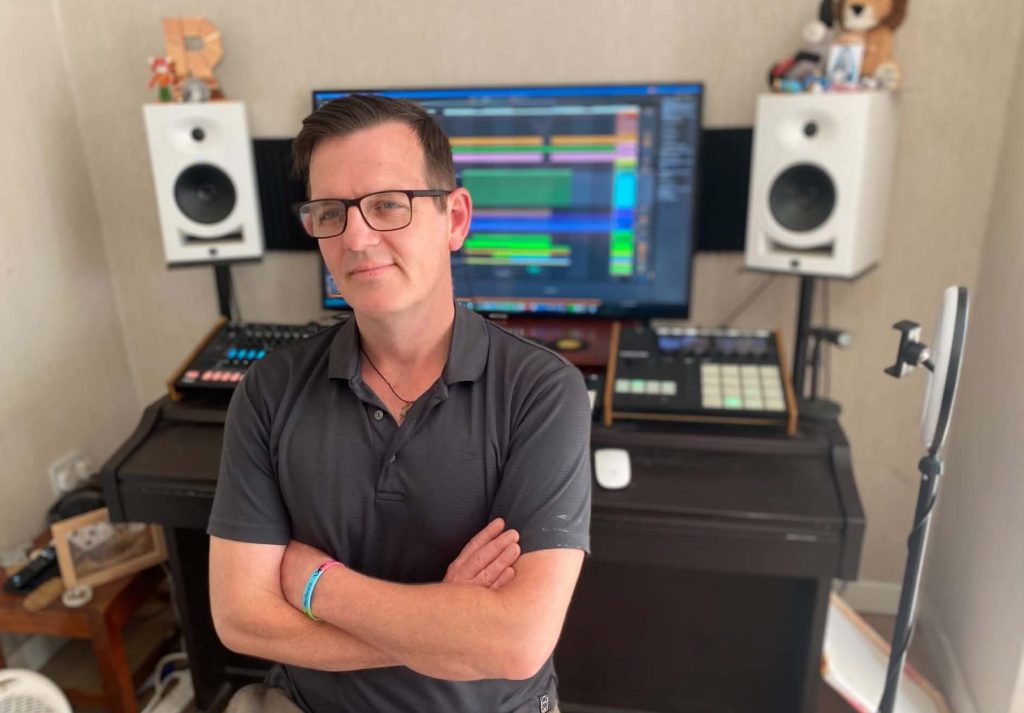
Will Vance is a professional music producer who has been involved in the industry for the better part of a decade and has been the managing editor at Magnetic Magazine since mid-2022. In that time period, he has published thousands of articles on music production, industry think pieces and educational articles about the music industry. Over the last decade as a professional music producer, Will Vance has also ran multiple successful and highly respected record labels in the industry, including Where The Heart Is Records as well as having launched a new label with a focus on community through Magnetic Magazine. When not running these labels or producing his own music, Vance is likely writing for other top industry sites like Waves or the Hyperbits Masterclass or working on his upcoming book on mindfulness in music production. On the rare chance he's not thinking about music production, he's probably running a game of Dungeons and Dragons with his friends which he has been the dungeon master for for many years.