Azumba’s “Mashamba” dropped today on May 8, 2026, marking his debut on the Afro house label after releases with YHV Records, Cafe de Anatolia, and Ostowana Records. The track centers on melodic writing, organic percussion, and a low-end foundation built for club systems, with its title drawn from the Swahili word for “fields” or “farmland.”
The record keeps its focus on space, rhythm, and gradual release. A vocal phrase leads the arrangement, piano chords shape the harmonic direction, and the bass follows the lower movement of the piano to keep the track grounded. From there, Azumba builds the drums, synths, FX, and vocal structure with a clear sense of section-by-section control.
For this How It Was Made feature, Azumba breaks down the full production process behind “Mashamba,” from the first vocal idea to the final arrangement. He walks through the piano writing, drum processing, bass design in Serum, synth layering, transition effects, and vocal placement that shaped the finished record. The rest of the feature is in his own words!
Hello everyone. Today I want to walk through how I created my track “Mashamba.”
It started with the vocal. That was the first part that caught my attention, and it gave me an immediate direction for the track. From there, I began shaping the piano part around the vocal so the two elements could sit together without fighting for space.
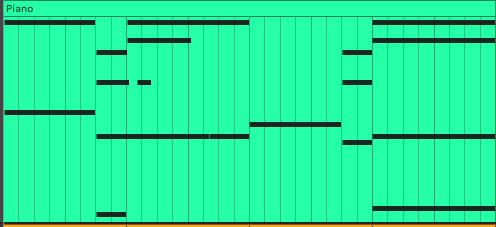
Building The Piano Around The Vocal
I started by matching piano parts to the vocal and looking for a balance between expression and restraint. The piano needed to frame the vocal without covering it, so I focused on long, sustained notes that gave the track a sense of space and movement.
I chose a soft piano tone with clear note definition, which helped it remain audible in denser sections like the drop. The chords came together intuitively. I was looking for combinations that would support the tone of the vocal, and I ended up with a simple sequence in a minor key that gave the track a melancholic, reflective mood.
Cleaning Up The Piano With EQ And Sidechain
After the piano and vocal parts were ready, I moved into frequency cleanup.
I used FabFilter Pro-Q 4 on the piano and cut everything below 195 Hz with a low-cut filter. The reason was practical: the bass line would later follow the lower notes of the piano. Leaving those low frequencies in the piano would cause the two parts to occupy the same range and create mix problems.
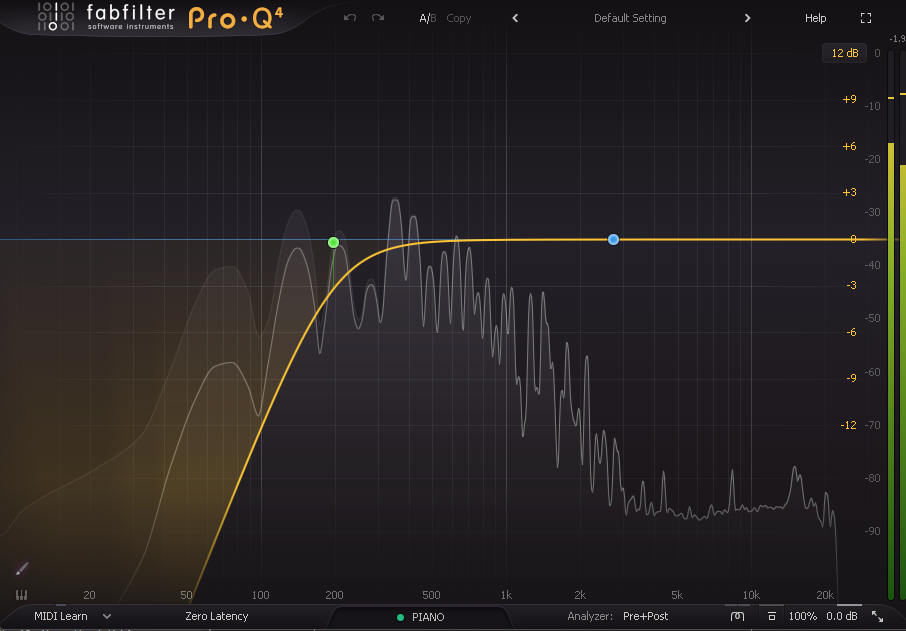
I also added KickStart 2 to the piano for subtle sidechain movement. I set the sidechain to affect frequencies up to 280 Hz and set the mix parameter to 40%.
Building The Drum Group
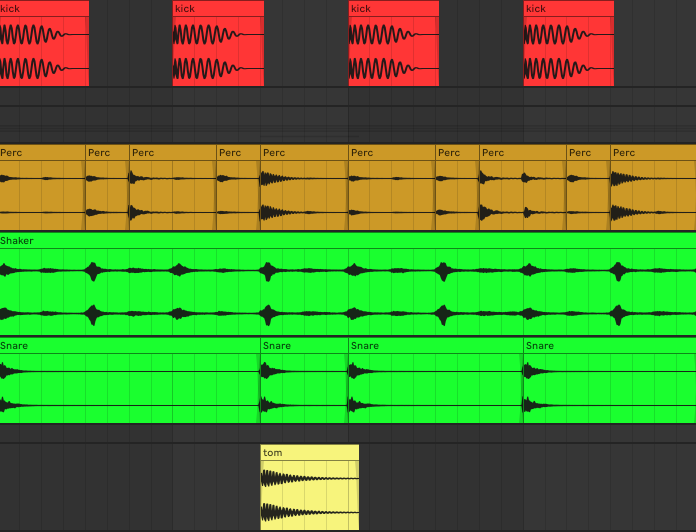
Next, I started selecting the kick, shaker, snare, percussion, and tom. I wanted each element to serve a clear role in the rhythm section.
The kick holds the center of the rhythm.
The shaker adds movement in the background.
The snare provides a clear accent.
The percussion adds smaller rhythmic details and gives the groove a more organic feel.
The tom fills the gaps between the main hits and reinforces the rhythm.
Processing The Drum Group
Once the drum group was in place, I started processing it as a full section.
I kept the kick in mono so it stayed centered in the mix. I also removed low-frequency clutter below 27 Hz, since those frequencies were clouding the low end and getting in the way of the bass.
A light glue compressor helped the drums feel more connected. I also used filter automation during transitions. In the lower-energy sections, the kick temporarily loses part of its bass content, which clears space before the next section enters.
This helped the kick and bass work together with better separation and gave the groove a cleaner shape.
Processing The Shaker
The shaker already had a slight stereo spread, which helped add width without making the mix feel unfocused.
I used EQ to cut everything below 380 Hz. This removed low-end rumble and kept the shaker away from the kick and bass range. I also added light compression to smooth out volume differences and keep the shaker consistent in the background.
For transitions, I automated a filter so the shaker becomes quieter and less present during lower-energy moments. Then it gradually returns as the section builds back up.
I also used KickStart 2 for sidechain movement. Each time the kick hits, the shaker dips slightly, which helps avoid clutter while keeping the rhythm active.
Finally, I added a small amount of reverb to give the shaker some space without blurring its transient detail.
Percussion Processing Summary
Stereo: moderate width for depth without losing focus.
EQ:
Cut below 120 Hz to remove rumble and avoid clashing with the bass and kick.
Boost around 400 Hz to add body.
Cut above 8-10 kHz to make space for the shaker and reduce harshness.
Automation: 2-3 dB volume reduction in lower-energy sections, followed by a smooth return to the original level.
Reverb: short room reverb with a 0.8-1.2 second decay time to add space and help the percussion sit naturally in the mix.
Processing The Snare
For the snare, I slightly widened the stereo field to give it a sense of space without pulling attention away from the center of the groove.
I cut everything below 300 Hz to remove low-end rumble and keep the snare away from the kick and bass. I then added light compression to control the level while keeping the attack intact.
A small amount of reverb helped give the snare depth and space, making it sit better in the mix without softening the transient too much.
Processing The Tom
The tom processing was simple.
EQ: I cut everything below 50 Hz and above 380 Hz to remove extra rumble and harsh overtones.
Compression: I added compression to control the dynamics and help the tom sit consistently in the mix.
Writing The Bass Line
Once the vocal, piano, and drums were ready, I moved on to the bass line.
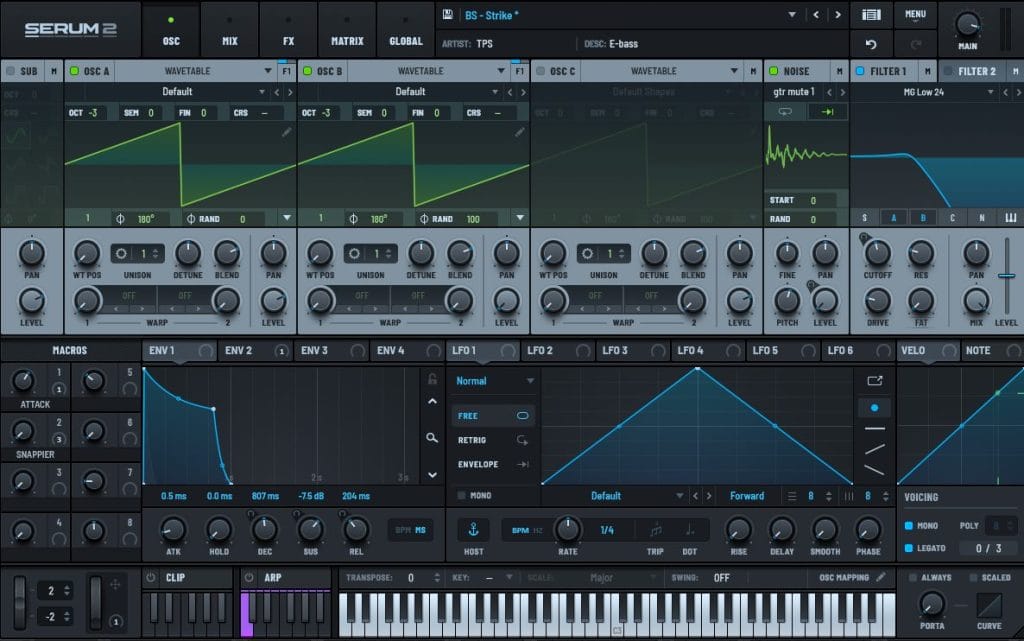
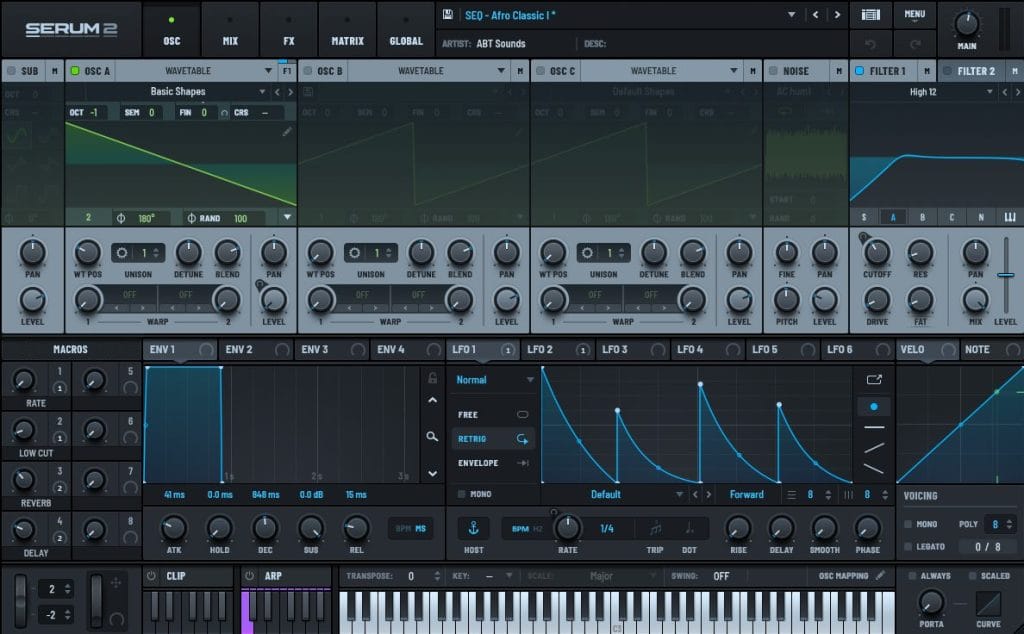
I used Serum and started with the Strike preset. I made a few adjustments by adding distortion and applying a filter to make the bass sit lower, with fewer mid and high frequencies.
The bass notes follow the piano notes, which helped connect the harmonic parts of the track.
The result was a deep, punchy bass that supported the drums while leaving space for the vocal and piano.
Bass Processing
The bass is fully mono, which gives it clarity and stability in the mix, especially on systems with a single subwoofer.
EQ:
I used a bell filter and made a small cut around 60 Hz to create room for the kick.
I cut everything above 1600 Hz to remove unnecessary high overtones and reduce clutter in the midrange.
Compression: I used FabFilter Pro-C 2 to even out the dynamics and add density.
Multiband compression: I used FabFilter Pro-MB and controlled the area around 300 Hz. This helped reduce boominess in the low mids and made the bass tighter.
Sidechain: I used KickStart 2 so the bass ducks slightly when the kick hits. This creates clearer separation between the two elements and improves groove clarity.
Low-frequency automation: I used FabFilter Simplon to automate low-frequency cuts during lower-energy and build-up sections. This freed up room for other parts and helped transitions feel smoother.
Writing The Synth Lead

One of the key elements of the track is the synth lead.
I used two Serum synths playing at the same time. They complement each other and create a fuller lead sound.
In the lower-energy and build-up sections, the synths play an octave lower. This creates tension and prepares the track for the main section. In the drop, I raise them an octave higher, which makes the lead brighter and helps the track reach its main point of release.
When writing the melody, I wanted it to be memorable and easy to recognize after the track ends. The lead needed to be bright enough to cut through the mix while still leaving room for the vocal, piano, and bass.
Synth Lead Summary
The synth lead works because of a few key choices:
Two Serum synths are layered together for a fuller tone.
The octave changes depending on the section.
The lower octave creates tension in the build-up sections.
The higher octave gives the drop more energy.
The lead sits clearly in the mix through EQ, balance, sidechain, and automation.
Synth Processing
I used FabFilter Pro-Q 4 on the synths for EQ cleanup.
EQ:
I cut below 280 Hz to remove rumble and leave room for the bass and kick.
On the first synth, I also cut around 2500 Hz to avoid clashing with the second synth. This helped each layer remain clearer.
Reverb and delay: I used Valhalla Reverb and Valhalla Delay to add space and depth.
Frequency range automation: I used FabFilter Simplon to adjust the synth tone across the structure of the track.
In the lower-energy section, I automated the high frequencies down so the synth felt farther back in the mix. During the build-up, I gradually brought those high frequencies back in, which helped the synth move toward its full tone before the drop.
Sidechain: I added light sidechain triggered by the kick, so the synth dips slightly when the kick hits. This helps the kick remain clear.
Compression: I used light compression to smooth the synth dynamics and avoid sudden level jumps while keeping the attack and expression intact.
Atmospheric Layers And Transition Effects
Throughout the track, a subtle atmospheric layer plays in the background. It fills space without drawing focus away from the main elements.
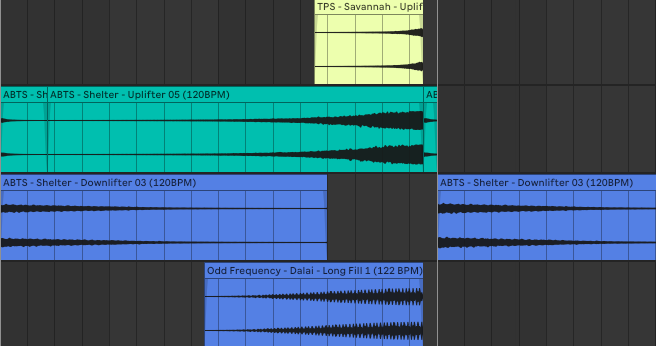
I also added uplifters, downlifters, and long fills to help connect the main sections.
Uplifters are used before the drop and other key moments. I usually build them with rising noise, Valhalla Room, and light Valhalla Delay.
Downlifters are placed before breakdowns or pauses. I often make them from reversed pads or low-frequency rumble with a gradual decay.
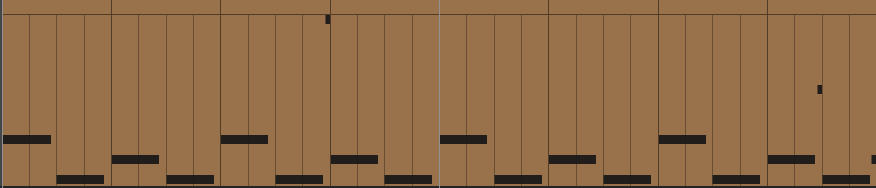
Long fills are used in longer transitions before the drop. In this track, the long fill was built from a series of snares, which added movement during the build-up and made the transition into the drop feel clearer.
Vocal Structure And Processing
Before finishing the arrangement, I returned to the vocal structure.
I wanted to preserve some mystery in the track, so the full vocal appears in the breakdown around the second minute. Before that, the first breakdown and drop use a looped phrase from the vocal, which became the vocal chop.
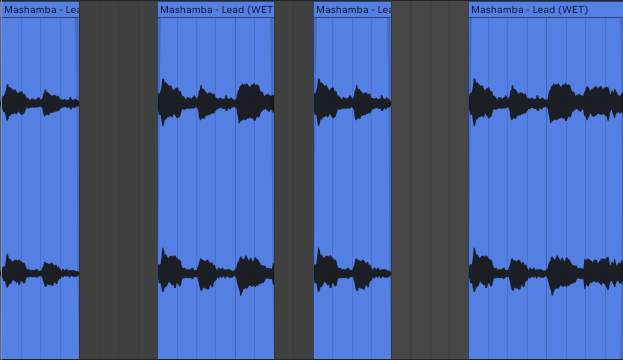
This helped create a gradual reveal. Before the full vocal enters, the listener hears fragments of it, which builds interest and gives the track a clearer sense of progression.
By the second minute, the full vocal enters in the breakdown. Since the energy is reduced at that point, the vocal becomes the center of the section and gives the track a clear emotional release.
Vocal Processing Summary
The vocal structure helped the track in a few ways:
The full vocal is introduced gradually.
The vocal chop connects the instrumental sections.
The transition from chopped phrases to the full vocal feels natural.
The full vocal becomes one of the main structural elements of the track.
Final Thoughts
That is the core process behind “Mashamba.” I heard the vocal, an idea formed, and I started building the track around it step by step.
Thank you for your attention.
Magnetic byline note: This byline is used for staff produced updates and short announcements, often based on press materials and official release information. Editorial responsibility: David Ireland (Editor in Chief) and Will Vance (Managing Editor). About: https://magneticmag.com/about/ Masthead: https://magneticmag.com/masthead/ Contact: https://magneticmag.com/contact/