HATIHATI stepped onto DEEWEE with a debut that feels deliberate from the outset, and “Whip It / Head” introduces a project built around texture, movement, and controlled experimentation. The pairing of Bart Demey and Tania Gallagher brings together years of individual exploration into a shared language that leans into repetition, detail, and sound design choices that avoid obvious references. It is a record that prioritizes character through construction rather than relying on familiar structures.
What defines the project is its approach to sound creation. Instead of relying on pre-existing samples, HATIHATI build material from the ground up, recreating everyday sounds through synthesis and shaping them into musical elements. That process feeds directly into the tracks’ identity.
Small details carry a lot of wight, and the result is a palette that feels tactile, slightly abstract, and consistent across both cuts.
This How It Was Made feature focuses on how that approach translates in practice. The tools themselves are not unusual, but the way they are used is. From hands-on synthesis and live recording to resampling and minimal automation, the workflow centers on capturing ideas in motion and refining them without losing their original energy.
ELEKTRON MONOMACHINE
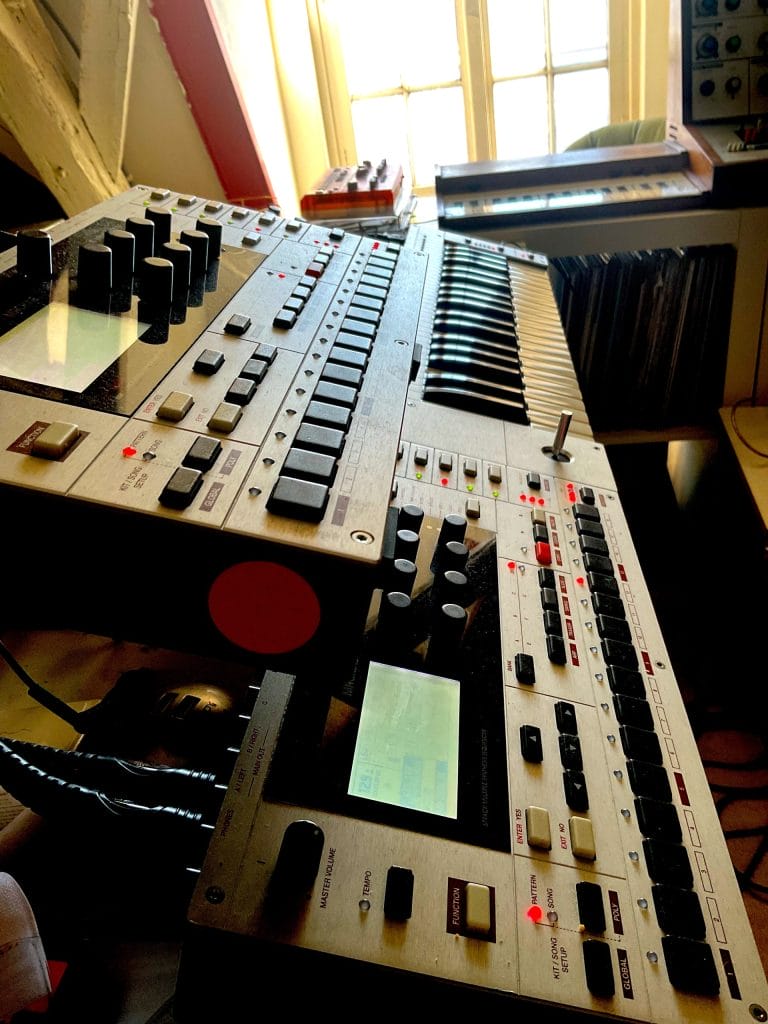
The Elektron Monomachine is a synth made by Elektron back in 2003, but we love it to bits. It’s essentially a six-track digital synth including FM, wavetable, and SID emulations. It has some really nice effects on board and the arpeggiator can do some crazy stuff. It’s packed with features and it has the pretty amazing P-locks that Elektron introduced with the first Machinedrum, another unit we really love to bits.
For Whip It we used the Monomachine keyboard version to play the bass sound. The bass sound you hear throughout the track was played and recorded live in a longer session, where we used the joystick extensively to shape the character of the sound. You can essentially assign any parameter from any track to the joystick, including the way you want it to work, up/down, left/right or all four angles. This really gets you into sculpting territory without having to look at a computer screen and automating stuff. We then cut up the segments we liked and built the track around it, but it basically stems from a long improv session. MNMs have a cold and crystalline digital edge to them, which we really like. It’s our favourite synth at the moment as it allows you to layer sounds and effects on top of each other. So you can really go deep on this one.
Another thing we often do is drop wavetables of sounds we like from analog instruments into Serum. The deep robotic vocal for Whip It was constructed by throwing the vocal chop into Serum as a series of wavetables. You can do it with any synth or sample you like and use it as a basis for a new sound. If you want to take it even further you can drop samples in the Noise section of Serum as well. It’s such a versatile and easy to use synth.
SERUM
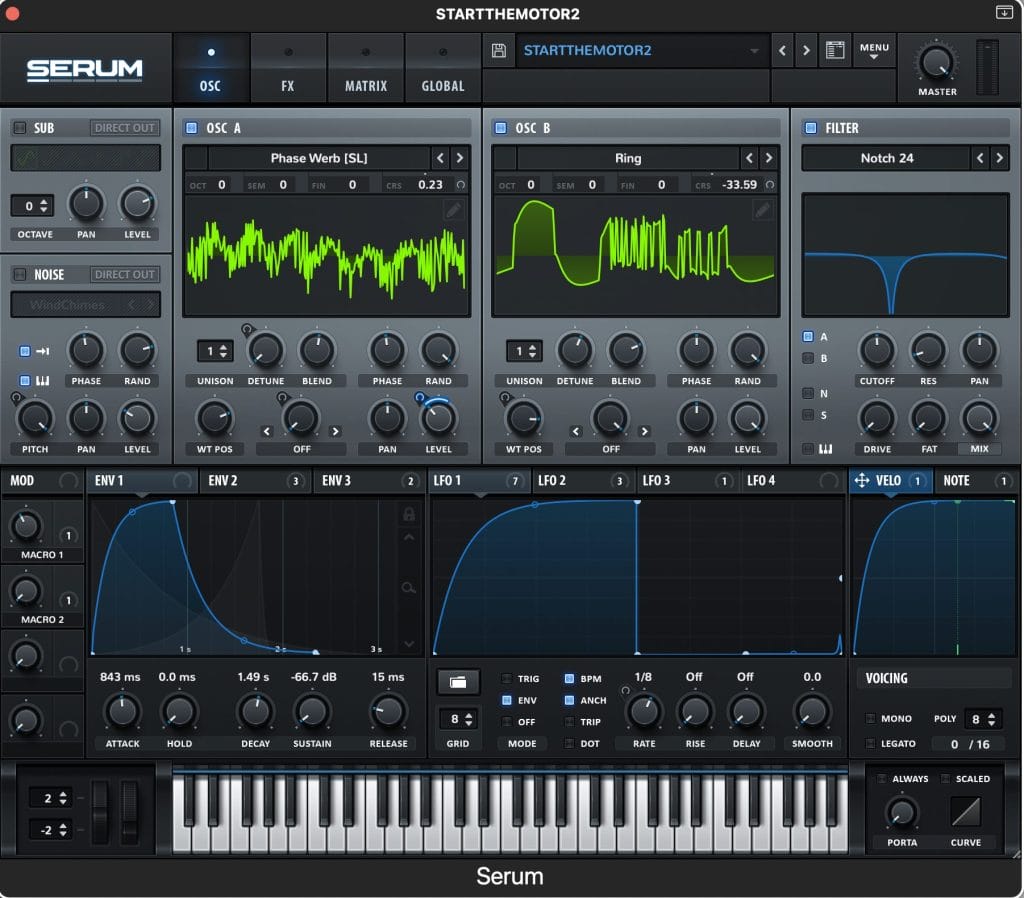
It’s the home of many sounds in our ‘Dear User’ library that we started building from scratch.
You can think up any sound and Serum gives you the tools and a canvas to build it. I can literally not fault it. Although it would have been great to add a feature like a patch mutator, like the software of the Nord Modular G2. It allows you to combine sounds as a mother and a father and create children with them. It’s so much fun.
LOGIC QUICK SAMPLER
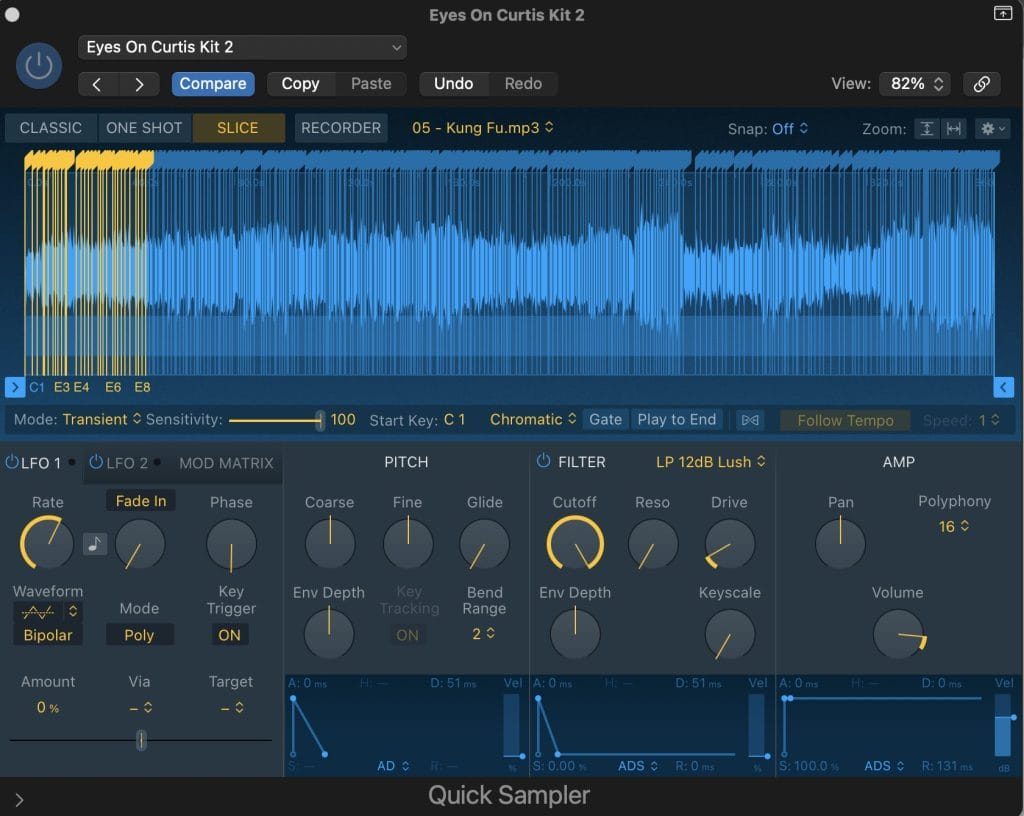
Simple but brilliant. You can drop any sample onto it and play it, filter it, add an envelope and LFOs. It’s fast and convenient and works really well for us.
We have used short fragments of vocals that are sliced up by the slicing tool inside this plugin. We sometimes use these as hi-hat or percussive sounds, but it could be anything really. We will generally put an arpeggiator within Logic on top of it and shorten or prolong the envelope as the track moves along in order to keep it interesting. The fun thing is that you can do this live in real time and just record the results. We are not big on drawing automation in a DAW, so this is another great way of doing things on the fly.
The plugin is basically an empty shell, but that’s also what is great about it. When you throw the sample in, it can play it, slice it up into segments within seconds and can quickly get results out of it that will shape your track in interesting ways.
We have learned it works best for us with vocals, but again, anything goes really.
RATSHACK REVERB BY AUDIO DAMAGE
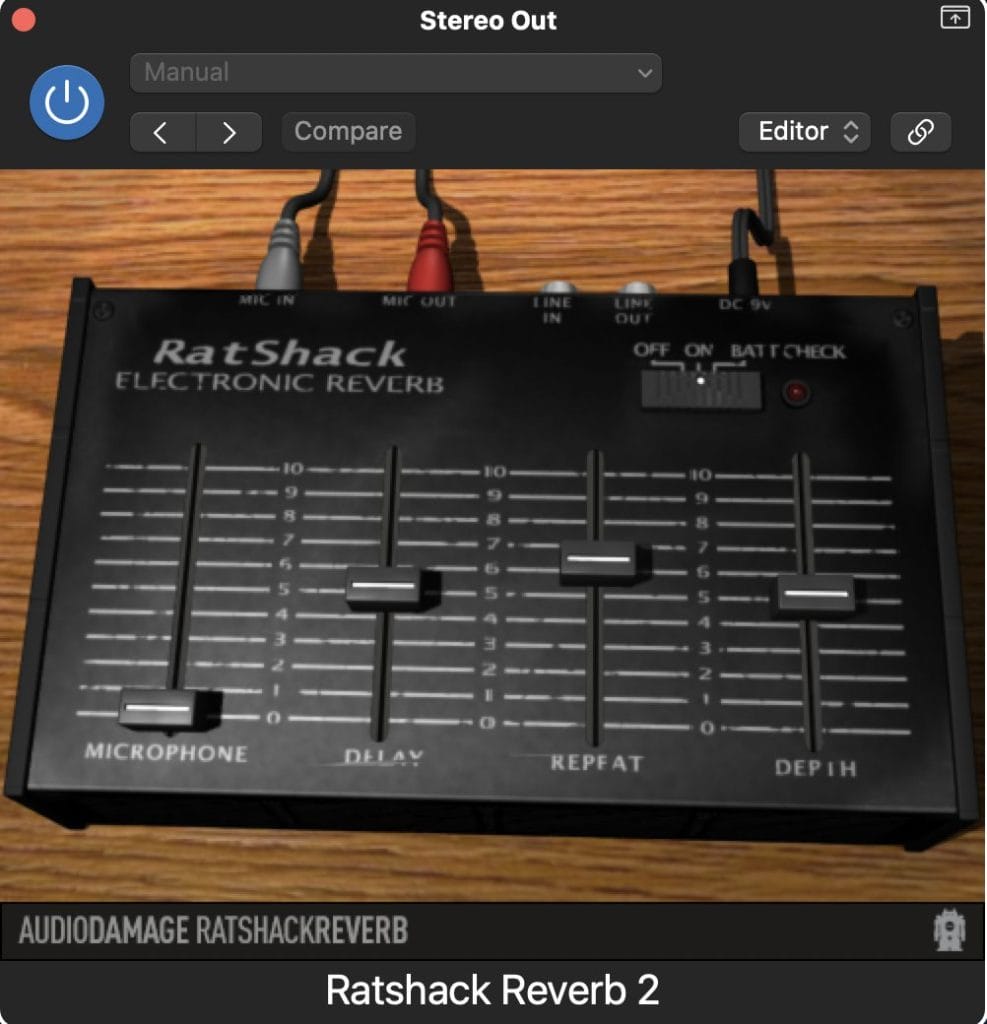
I believe we got this one for free. It’s a recreation of a box we used to have, made by the cheap electronics company Tandy somewhere back in the ’80s. This recreation is actually pretty good and does exactly what it says on the tin. It’s a gritty echo delay box with a few simple controls but loads of character. It’s not for every session, but we did use it extensively on HEAD, mainly to add more grit to the high pitched vocals.
There’s not really much to say about it in terms of using it, as it’s so simple to use. But dirty delay and echo boxes are just so much more fun than the clean ones found stock in many DAWs. Just a great gritty bad reverb box.
CHANDLER LIMITED CURVE BENDER (UAD)
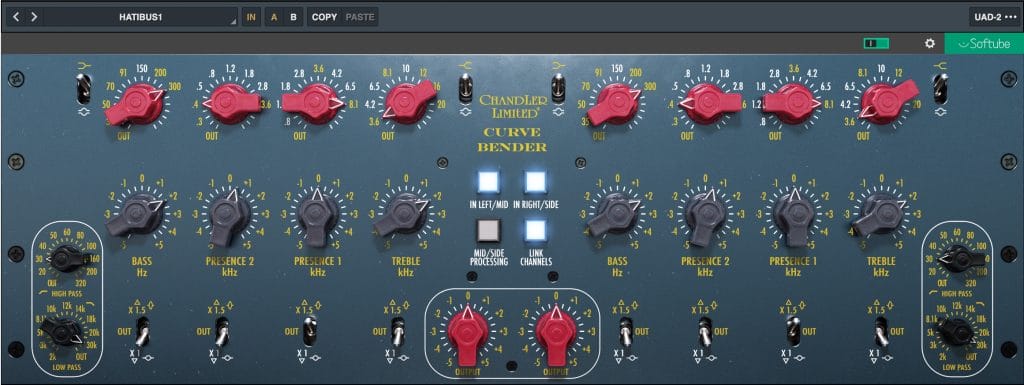
This is our go-to tool for the mix bus. It’s not a sterile EQ. Look at it more like a toneshaper with lots of character. It always sits on our mix bus and I don’t believe it’s ever been off for the last two years.
It’s essentially based on EMI circuitry from Abbey Road. Wade Goeke, the genius behind Chandler Limited, made a hardware version first with some alterations, such as more frequency points, a multiply switch for the boost and cut and some other interesting additions. The UAD version by Softube adds M/S and channel linking which comes in useful. One small tip, it’s easy to go overboard with this plugin. It sounds amazing but be careful not to overdo it.
HATIHATI’s QUICK TIPS ON MAKING MUSIC:
TIP #1: Don’t go looking for sounds where everybody else is looking. You know the usual supermarket sample suspects. Instead, spend time crafting your own sounds. It will become your signature, and you will get to know yourself better in the process. It might be a hard start but just like anything, it gets easier the more you do it.
TIP #2: Your Ears are the most important tool you have. You can make great music with anything out there. Dont let restrictions about gear come between you and your ears.
TIP #3: Mute and continue. If you have 66 tracks, try muting some and see if you can boil it back down to the essence. Sometimes things get clearer when there is less in the way.
TIP #4: Don’t be afraid to treat instruments together as a group. Not every track needs to be eq’d to oblivion.
TIP #5: Unquantize. If you quantize everything your music becomes too rigid. Although it works for Techno, which relies on repetition and trance, it does not work for a lot of other styles.
Will Vance is a professional music producer who has been involved in the industry for the better part of a decade and has been the managing editor at Magnetic Magazine since mid-2022. In that time period, he has published thousands of articles on music production, industry think pieces and educational articles about the music industry. Over the last decade as a professional music producer, Will Vance has also ran multiple successful and highly respected record labels in the industry, including Where The Heart Is Records as well as having launched a new label with a focus on community through Magnetic Magazine. When not running these labels or producing his own music, Vance is likely writing for other top industry sites like Waves or the Hyperbits Masterclass or working on his upcoming book on mindfulness in music production. On the rare chance he's not thinking about music production, he's probably running a game of Dungeons and Dragons with his friends which he has been the dungeon master for for many years.