Longtime label affiliate, Juheun, returns to Tronic Recordings next month with a brand new two-track EP titled ‘Exhale’. The American-Korean DJ and hardware aficionado is also the co-owner of Circuit Arizona, with his partner Michelle Sparks, an event and promotion company focused on the Techno scene in Phoenix.
Already a frequent figure on Phoenix’s underground dance scene, Juheun’s prominent post-apocalyptic aesthetic and compelling production techniques have previously led to numerous releases on Octopus Recordings, Unity Records, and Set Tronic. For his next EP venture, Juheun is back on Tronic, marking his first release via Christian Smith’s imprint since 2024’s ‘Gods House’ EP.
“I’m super excited to be back on one of Techno’s most reputable and legendary labels, Tronic. This release is a special one for me because I had the opportunity to get Frank Biazzi, who I’ve been a big fan of for many years, to remix one of the unreleased tracks that I’ve been keeping tight for my DJ sets. His take on the B-side for “Let’s Dance” elevated what was already a dance floor weapon to the next level with his signature sound.”
Diva by U-he
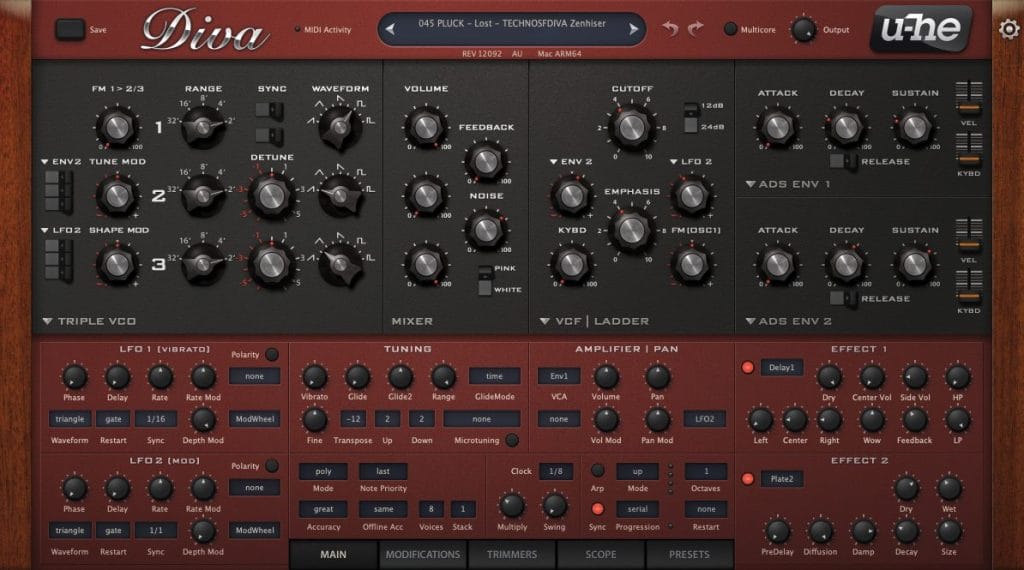
The soft synth I used for the main lead in ‘Exhale’ is Diva by a company called U-he. It’s my go-to synth and has been in so many of my records since it first came out. The synth is modeled after analog additive, subtractive, and FM synthesizers like a Moog or classic Roland synthesizer, but packed with so much more. It has really nice filters, and its advanced algorithms help recreate that analog sound we love. Right out of the box, Diva sounds amazing so it doesn’t take much to give it that fat analog warmth and feel we all chase after. I’m using Diva for the main arpeggiated lead pattern you hear throughout the track and in the breakdowns. It really gives the track its energy and drive. You can hear me playing around with the filter and release on the envelopes to help create excitement and tension throughout the track.
I like to record my automation live using a MIDI controller mapped to the filter cutoff on the Diva, and then I go back and clean up the automation so it’s a bit more precise. Aside from the lead synth, the vocal is a main feature of the track, so I have the Diva filtered down when the vocal is playing so that it’s not clashing with the lead. It really helps them to complement each other, almost like a call-and-response between the two. I’m using an EQ to tame some of the low end, a little distortion from the Thermal plugin, and a little bit of “Glue Compression” to round out the channel, but most of the meat is coming straight from the Diva synth itself. When it comes to effects, I’m a fan of turning off the internal ones on the Diva, and instead using third-party reverb and delay effects on bus channels to route the synth to. I’m using Valhalla’s reverb on the stereo wide hall preset to give it space and a stock Ableton Delay on a second bus channel to give it some nice delay/echo.
When it comes to Techno and underground sounds, Diva is definitely a good choice for soft synths. It’s packed with some amazing presets to get you started, and there are so many third-party preset packs focused on Techno to help give your productions that techno vibe. One key section to play around with and explore is the trimmers tab on the bottom of the synth. This opens up the oscillator voice detune section. For each of the 3 oscillators, there are 8 oscillator voice detune knobs. You can adjust these 8 knobs/layers randomly and then turn up the detune amount knob to get some really crazy results to help make the patches and sounds even more unique.
Aicd Max for live Arpeggiator plugin
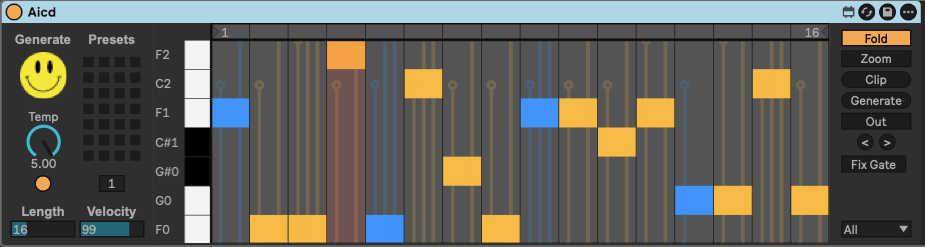
I’m a sucker for arpeggiator plugins, and for the main Diva synth lead I used a third-party Max for Live MIDI effect plugin called “Aicd”. “Aicd” gives me the ability to create some crazy patterns with its on-board auto pattern generator that just spits out random patterns with a click of a button. It really helps create some outside-the-box patterns and ideas. This is one of the reasons why I love electronic music so much: you’re letting the plugin/machine do the unpredictable, and sometimes that can create some crazy results that you would have never done on your own.
On ‘Exhale,’ I’m using the default 16 note pattern length because I wanted a really melodic pattern that didn’t sound too loopy. Depending on the vibe and what I’m using it for, I’ll shorten the pattern length down to 4 notes sometimes to get that really loopy pattern you hear in raw and hypnotic tracks. You can also adjust the velocity to give it more of a dynamic feel to the pattern. I like this plugin a lot because it’s straightforward without a bunch of extras and just does what it’s supposed to do.
You don’t always have to use this plugin just on lead sounds, either. Try using it for bass or even drum samples. Load up a sampler device, drop in a high hat sample or a shaker sample, and let the plugin generate a random pattern to control the sample for some really interesting drums or percussion. You can even use it on vocal samples to get some really trippy vocal patterns to layer in your track. The possibilities are endless with this thing.
Thermal Plugin from Output
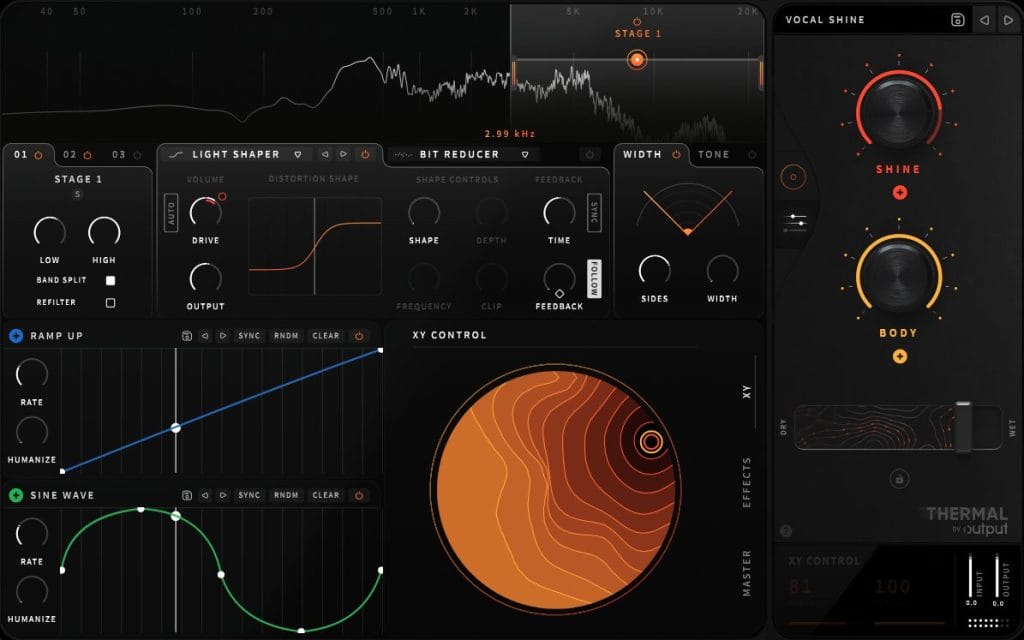
One of my favorite distortion plugins, named Thermal by a company called Output, is something I use quite a bit on my records. I love throwing this thing on everything! When you first open the plugin, all you see is its massive XY macro control and two main control knobs that change depending on the preset you pick. However, don’t let it fool you. Once you access and open the advanced controls and reveal its features, you will see how much power this thing has under the hood. It even has built-in effects like reverb, delay, and flanger. In ‘Exhale’, I’m using it on all sorts of sounds and layers to help give the track its grittiness. The drums, lead, and even the vocals have an instance of Thermal on them. It’s easy to let this thing go wild, and some of the presets in it can be overwhelming, so it’s all about finding the right balance between the settings to not go full throttle unless that’s what you’re looking to achieve. I’m using it on the drums and lead for added distortion, and for the vocal, I’m using the vocal shine preset to help polish it a bit and to give it some more character and color. I often find myself using the ‘Width and Heat’, ‘Rich Aggression’, and ‘Mothership’ presets a lot in my tracks.
I find this is one of those plugins where “Less is More” truly matters. It’s easy to let this thing go out of control because of how cool it sounds on certain sounds, but subtlety is the key to not overdoing it. I try and use it sparingly just to add a bit of character or color to sounds rather than smashing it from the get-go.
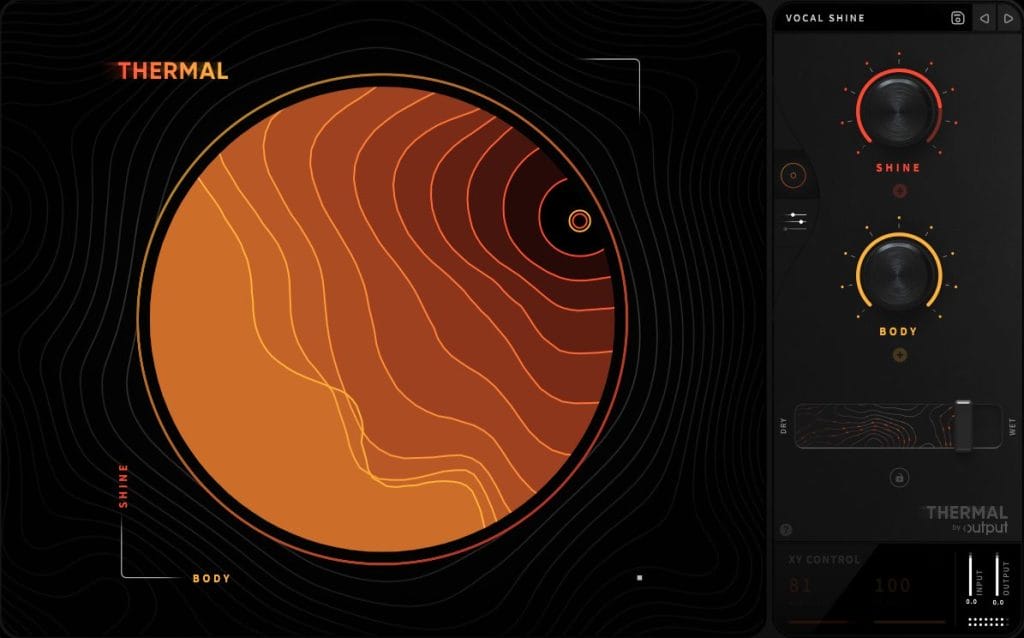
Doing this allows me to increase the effect over time using automation, which helps build tension and excitement to certain sounds for build-ups leading into drops. It’s also a great tool to help widen sounds in the stereo field to help make them stand out more in the mix. It’s a very versatile plugin when it comes to things like that.
Vox Samples
Stutter Master 2 Beat Repeater
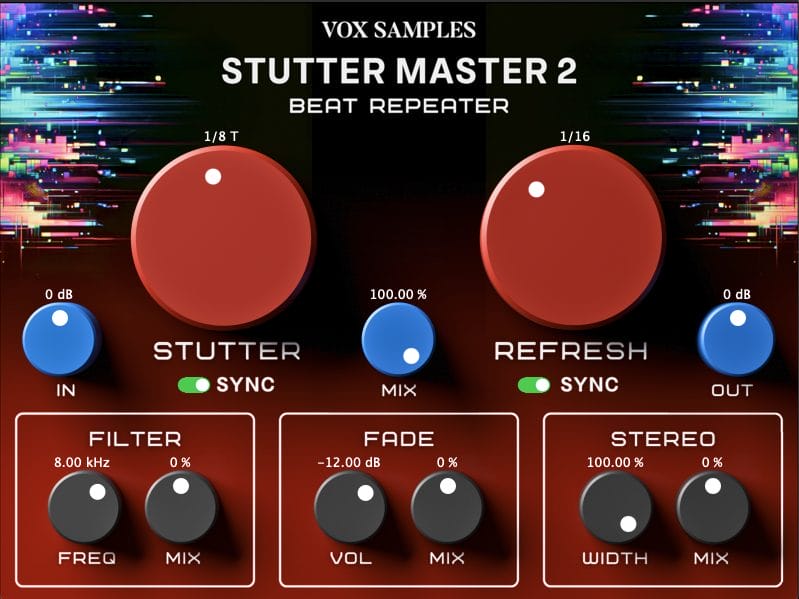
One of my other favorite effects plugins I used on this record is called Stutter Master 2 by a company called Vox Samples. It’s a beat repeater effect that lets me add some really nice stutter and glitch effects to any sound. Instead of manually trying to chop and edit a sound or sample, which can be tedious and take some time. Aside from the obvious, Stutter Master 2 also comes with some additional features and controls that help give you some added control over the glitch and stutter.
I have this plugin on the main Diva synth lead, and I use it during the breakdown to create some extra intensity, but also use it on the vocal in the final breakdown for the buildup to stutter and chop the vocal right before the drop. A couple of the features I love, which seem pretty basic but can be very effective, are the In/Out and Mix knobs. Most plugins have some sort of Mix or Dry/Wet knob to determine how much of the effect is added to the original sound. When it comes to stutter and glitch, most people just think it’s more of an in-your-face on/off effect. Where you punch it in and out. Instead, it lets you control the amount of the stutter and glitch effect so that you can make the effect sit behind the sound and slowly let it take over the sound over time. It’s also a good way to add an extra layer to your sound when things sound a bit thin.
One of my favorite things to do is automate the built-in stereo width and mix knobs over time, especially in the build-up right before the drop. You can use this trick in any genre, but for stripped-back techno and raw and hypnotic tracks where there’s not a lot going on, it’s a great way to add some extra spice to your build-ups to keep things interesting. You can really create some huge moments by playing around with the stereo field with this feature for added excitement and tension.
Quick Fire Tips For Making Music:
Tip #1:
When it comes to techno, it’s always all about the kick and the bass. For me, it’s always about finding the right balance between punch and bounce.
Tip #2:
It’s good to try and be unique, but using familiar drum samples from machines like the 909, 808, and 606 will help keep the backbone of techno. Stay away from samples or drums from acoustic recordings or genres outside of techno unless it’s purposeful. Remember, it’s called electronic music for a reason.
Tip #3:
Less is more! It’s not always about stacking and cramming in as many sounds as possible. Silence and space between sounds are sometimes even more important than the sounds within the track.