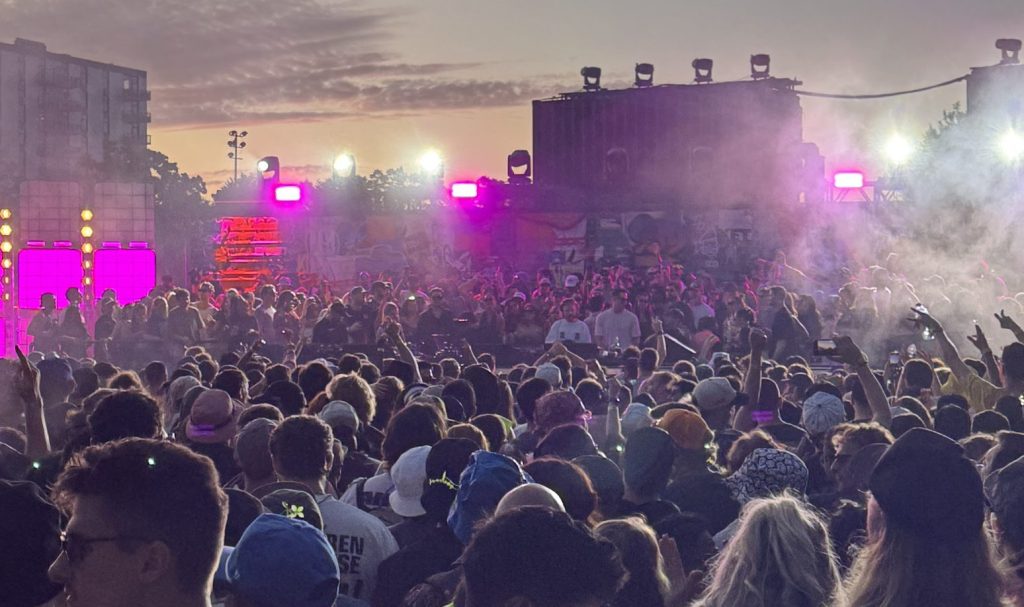
Pretence’s arrival on HypnoVizion comes with intent. Dragon, his 140 BPM techno and psy-trance hybrid, doesn’t waste time building toward impact. From the first kick, it’s all forward momentum, layered with razor-edged synths and low-end pressure that feels purpose-built for the biggest rigs. The track has been on heavy rotation among artists like Sara Landry and I Hate Models, and now it’s officially in the hands of the public.
The release marks a key moment for Pretence, an Australian-born and Canada-based producer who has been steadily pushing into heavier territory. His roots in Sydney’s underground rave scene shaped the aggressive style he carries into every project. That intensity caught the attention of Rezz, who signed Dragon to her label after hearing it in one of Pretence’s live sets. The result is a record that reflects the darker, high-energy end of his sound while showing the precision he brings to arrangement and production.
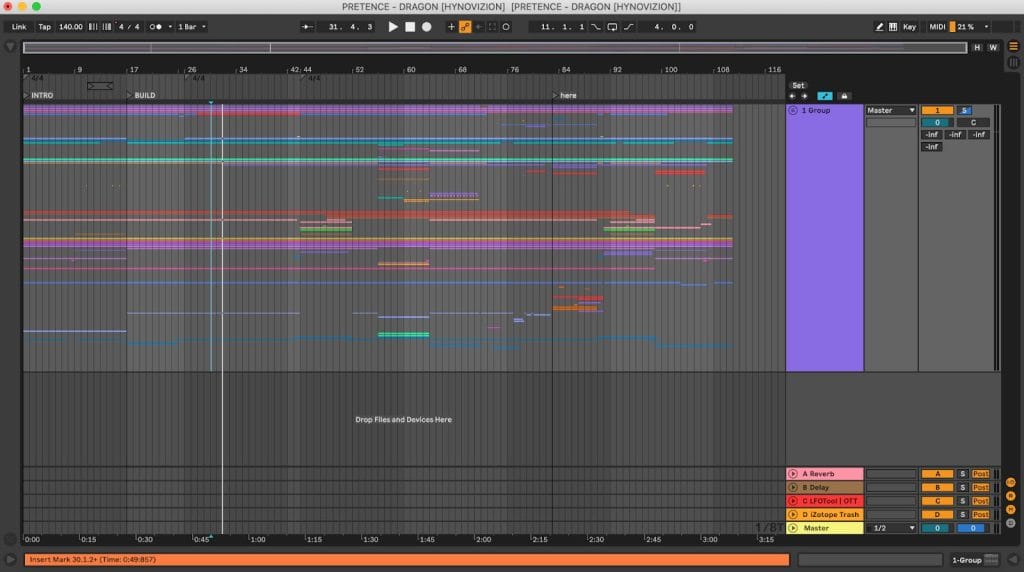
In this feature, Pretence pulls apart the layers of Dragon and walks through the tools that brought it to life. From comb-filtered bass hits in Serum to organic textures from Kontakt, every element was chosen to serve the track’s relentless energy. It’s a direct look at how a modern hard techno weapon is built from the ground up.
Serum (Xfer Records)
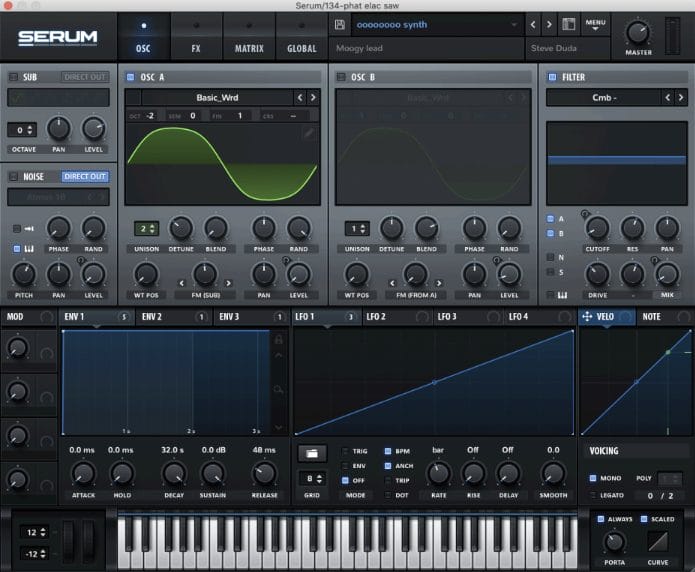
Serum is my main synth for anything aggressive or high-energy. The control you get over the sound design is unmatched – especially when you start messing with comb filters, custom wavetables, and LFO automation. It’s clean, powerful, and can get weird in the best way possible.
For this track, I used Serum on a few key elements. The first big bass hit was built from a sine wave and comb filter, then layered with a train sample for that raw, industrial punch. Another heavy lead was built from a square wave and a Monster wavetable – both routed through a comb filter with the cutoff automated, plus some post-filter movement using Auto Filter and resonance. I also used a low-passed sine bass for the main drop, heavily processed to punch through on a big rig. Serum gave me the perfect balance between precision and chaos.
If you’re making psy or hard techno, don’t sleep on comb filters in Serum – they’re amazing for metallic textures and synthetic screeches. Start with basic waveforms and build movement through LFOs and macro automation. And don’t forget to bounce to audio when it’s getting too CPU heavy – you’ll open up even more resampling possibilities.
Kontakt (Native Instruments)


Kontakt might not be the first thing you think of for techno or psy, but it’s sick for adding contrast. It’s basically a sampler that runs high-quality instruments – and it’s clutch for layering something organic on top of a track that’s otherwise mechanical and driving.
I used Kontakt for the main melodic lead – a Kora instrument that had this plucky, almost string-like quality. I filtered out both highs and lows with a notch filter to give it a narrow, focused presence in the mix. It gave the breakdown a real human feel, which made the drop hit even harder when everything came crashing back in.
If your track is starting to feel too digital or flat, Kontakt can bring some unexpected flavor. Even just a small melodic phrase or texture, heavily filtered and placed in a break, can add a ton of contrast. Think of it like tension and release – organic vs synthetic.
Ableton OTT
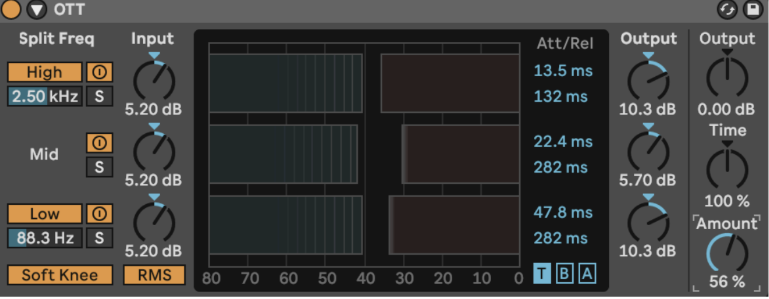
OTT is like rocket fuel for sounds. It’s a multiband compressor that lifts up the quiet parts and slams down the loud parts, which works especially well on distorted sounds, basses, and aggressive FX.
I threw OTT on a bunch of stuff in this project. It helped bring out the grit in my bass layers (especially after distortion and EQ), and made my vocal chop (‘dragon’ – recorded on my
iPhone) feel way more intense after some EQ and saturation. I dialed back the depth so it wasn’t too squashed, but it really helped glue everything together.
For hard techno or psytrance, OTT is great for making sure your sounds cut through without just turning them up. Just don’t overdo it – too much OTT and your mix will sound crushed. Try blending it in subtly after distortion to keep the energy tight without killing dynamics.
CamelCrusher

CamelCrusher still holds up. It’s simple – distortion, compression, and a filter – but it works great when you want to bring character and filth to your basses or drums. I love how quick it is to dial in and how much attitude it adds right away.
I used it on my initial bass layer (from Serum) to beef it up and give it more saturation. I pushed the Tube Distortion for warmth, dialed in the Mech mode just a touch, then filtered it so the highs didn’t get too nasty. It layered really well with the train sample and helped the bass sit nicely in that gritty, heavy pocket.
If you’re into industrial-leaning techno or distorted psy stuff, this one’s a gem. Try throwing it on percussive elements too – things like metal hits or reverb tails, then filter and automate to build some evolving noise layers behind your kick and bass.
Thermal (Output)

Thermal is next-level for creative distortion. It splits the sound into multiple frequency bands and lets you distort each one differently, which gives you full control over how the highs, mids, and lows behave. It’s perfect for when you want distortion that’s more detailed and musical.
I used Thermal on the main sine bass to bring out some extra presence in the top end — kind of like Erosion or Downsample in Ableton, but more customizable. After the initial processing (distortion, EQ, multiband comp), I ran it through Thermal and used it to add this sharp, resonant texture that made the bass feel more alive in the high-mids.
In fast, loud genres like this, Thermal helps you shape distortion without turning things into mush. I’ve found it works best when you isolate just the highs or mids and hit them with soft clipping or saturation – leave the subs clean, and everything will sound way more intentional.
LFOtool (Xfer Records)
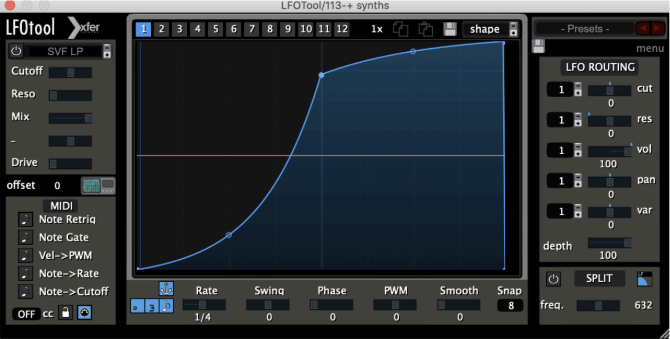
LFOtool is my go-to for sidechaining. I prefer it over compressors because you get total control over the shape and timing of the ducking – no worrying about thresholds or release times.
I used it to sidechain all my low-end to the kick – Serum basses, sub layers, everything. I drew a custom curve that ducked hard at the transient, but then curved back up smoothly so the groove kept flowing. Especially at faster BPMs like 140 to 150, it helps keep everything snappy without over-compressing.
If you’re producing psytrance or hard techno, LFOtool is a must. It keeps your kick and bass tight while still letting the rest of the sound breathe. You can also use it to gate hats, FX, or even automate filters rhythmically – it’s basically a rhythm tool in disguise.
Quik Tips For Making Psytrance
Tip #1:
Start with a simple sine or square wave, then distort the hell out of it. Process it until it sounds broken – then push it even further.
Tip #2:
Use comb filters to create metallic, alien textures that cut through the mix. Automate the cutoff to give your sound movement and character.
Tip #3:
Bounce your basses to audio and resample them. Stretch, pitch, reverse, and reprocess – that’s how you get that gritty, evolving energy.
Tip #4:
Sidechain everything to the kick – not just your bass. That pumping rhythm is what makes hard techno feel alive.
Tip #5:
Breakdowns are your moment to surprise. Add something melodic, organic, or weird AF before slamming back into the chaos.
Magnetic byline note: This byline is used for staff produced updates and short announcements, often based on press materials and official release information. Editorial responsibility: David Ireland (Editor in Chief) and Will Vance (Managing Editor). About: https://magneticmag.com/about/ Masthead: https://magneticmag.com/masthead/ Contact: https://magneticmag.com/contact/