A decade ago, getting a granular plugin to do something I actually wanted could take longer than I cared to spend on one small detail. I loved the textures, especially those short, bright fragments that added something different to a track, but getting there could be frustrating.
Omnisphere 2 became my preferred way to experiment because I could load a sample and work inside a synth I already understood. I kept coming back to granular processing because I liked the results enough to tolerate the extra work.
That history is why I pay attention when a company tries to make granular effects easier to use.
There are plenty of plugins capable of producing strange sounds. The question for me is how quickly I can get something I want to keep, especially when I’m already working on a song and don’t want to spend the afternoon learning another interface. I’ve discussed some of my preferred approaches in my granular plugin roundup, and I’m still looking for ways to speed up that process.
Baby Audio’s HyperWarp caught my attention for exactly that reason.
I generally like how the company handles macro controls, where a few adjustments can change a sound substantially without making the plugin hard to use. Still, granular processing is a different proposition from a bass enhancer or a transition effect, so I had some reservations. Baby Audio sent me an early copy, and after roughly a week with it, I found a lot I liked and a couple of things I wanted it to do differently.
What HyperWarp Actually Does
HyperWarp is a granular multi-effect that you insert on an existing audio track or instrument.
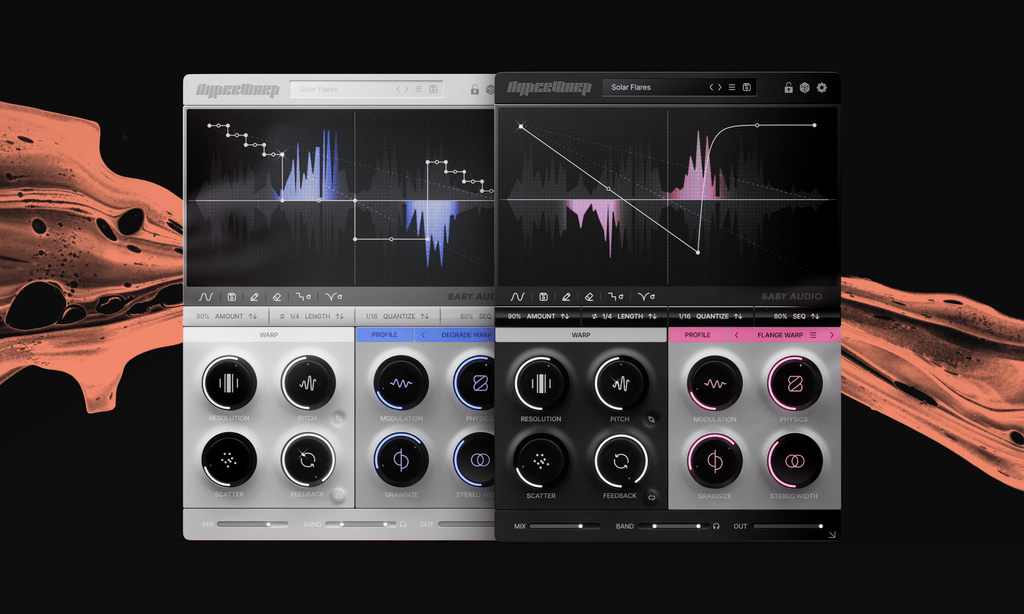
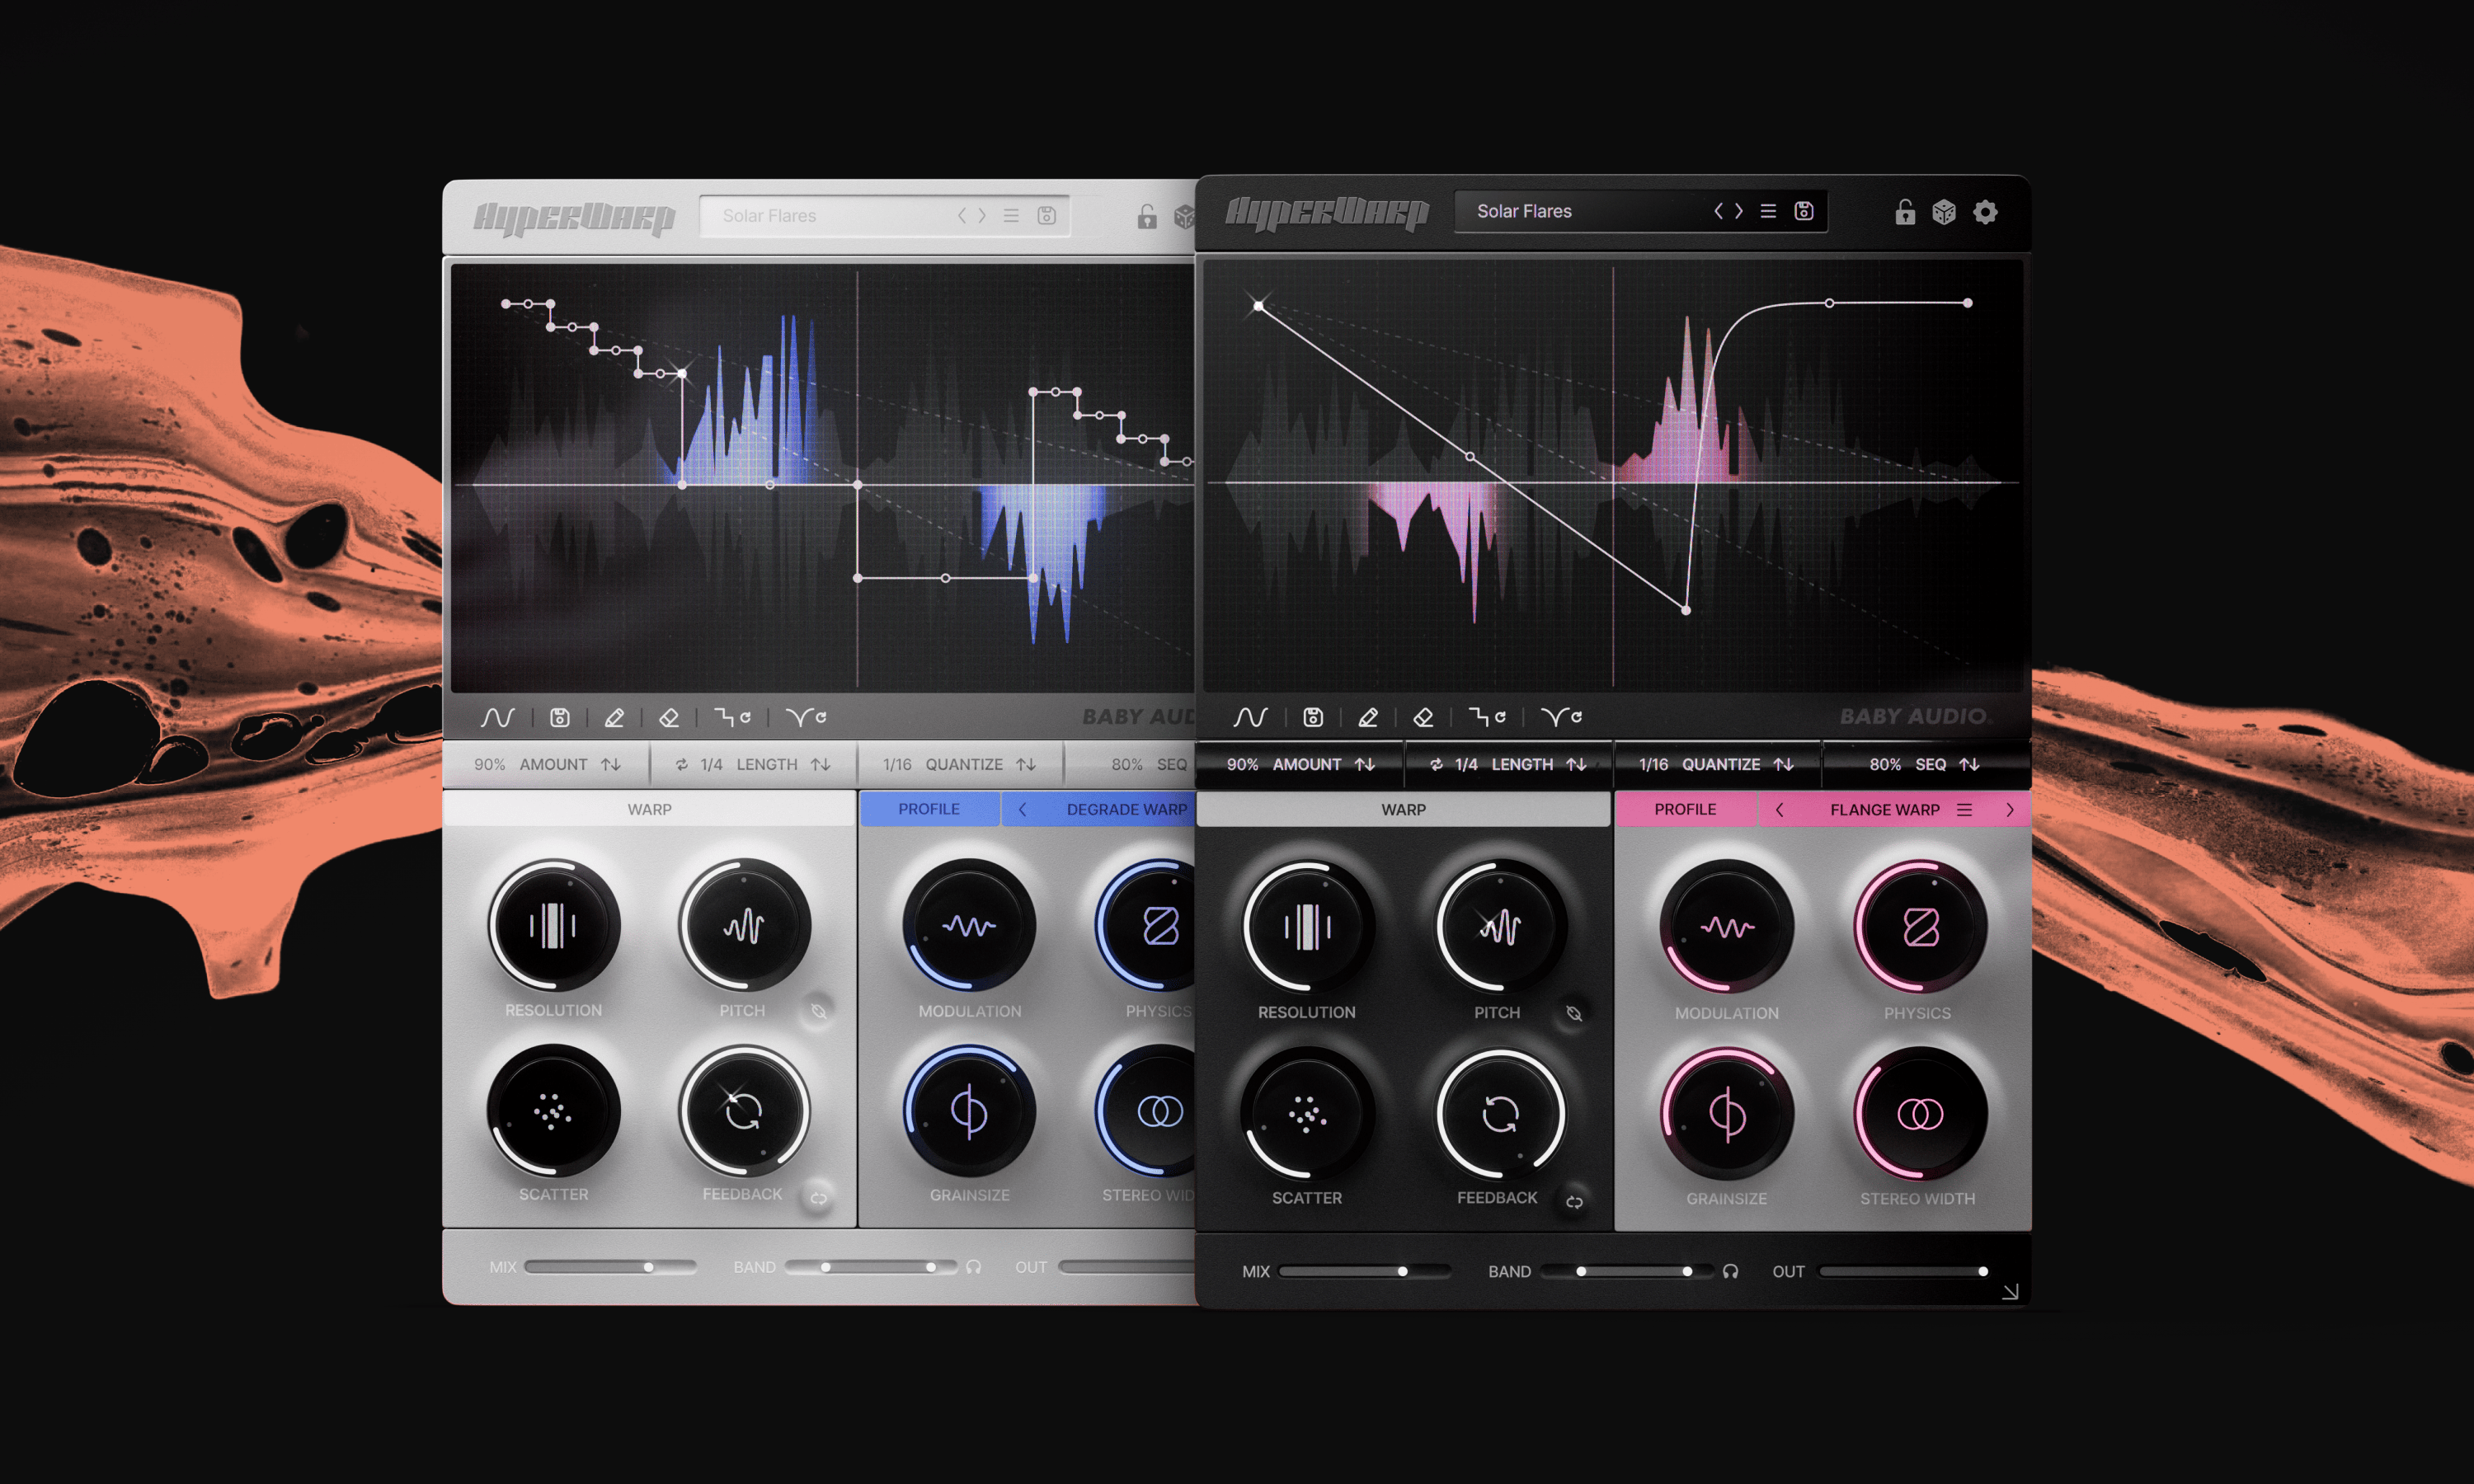
It divides the incoming audio into small fragments, then processes their playback according to a time-warp graph and your chosen effect profile. Seven profiles, each with four dedicated macro controls, cover approaches such as filtering, flanging, degradation, and added harmonics. You can create repetitions, reverse playback, change speed, and alter the texture of the material you’re already using.
The Interface Got Me Experimenting Quickly
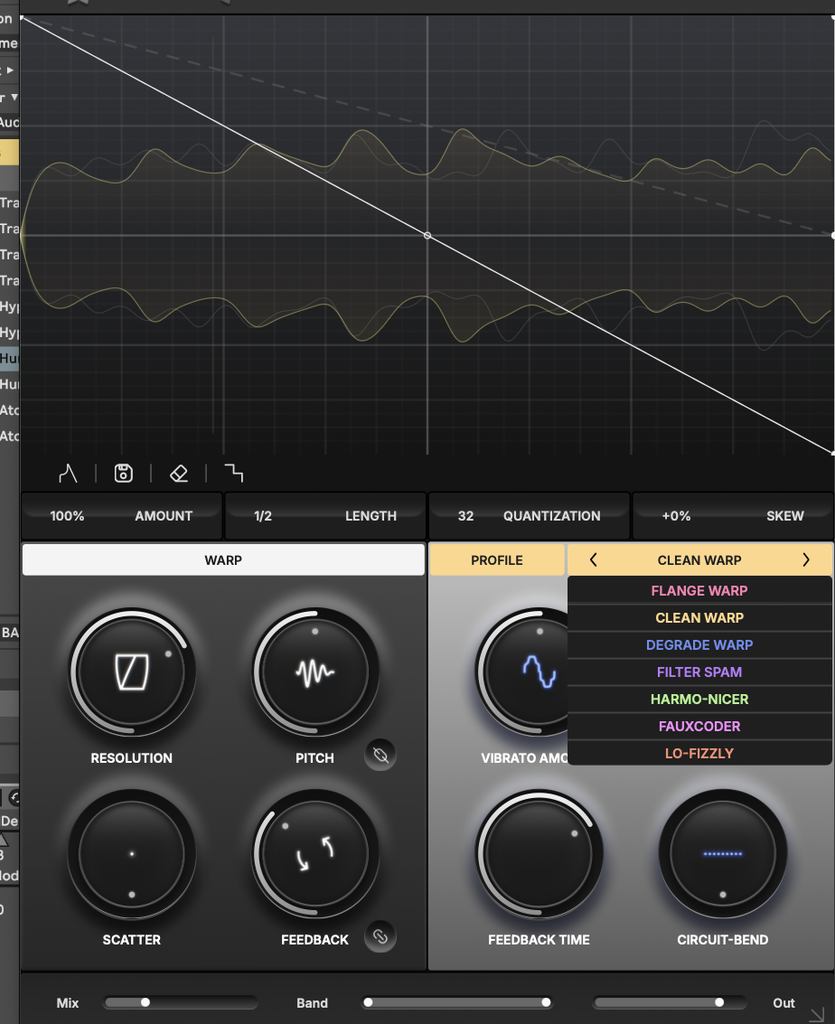
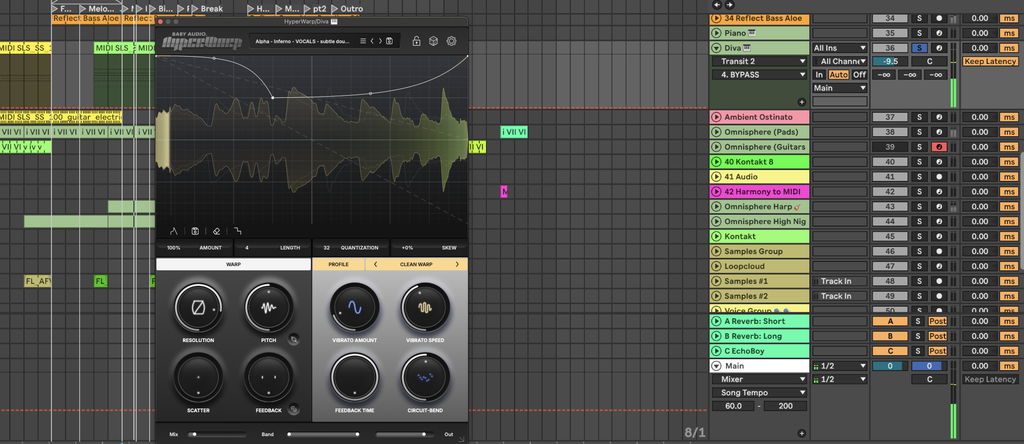
The interface gave me the kind of first impression I hoped for from Baby Audio. I could start experimenting quickly, and I liked having the graph above the processing controls so I could watch the pattern while listening. It’s a time-warp graph: steps return to earlier audio to create repetitions, while slopes and curves change playback speed. Seeing that pattern helped me connect the changes I was hearing with what I’d programmed.
I don’t want to become an expert on a granular engine just to add a few details to a song.
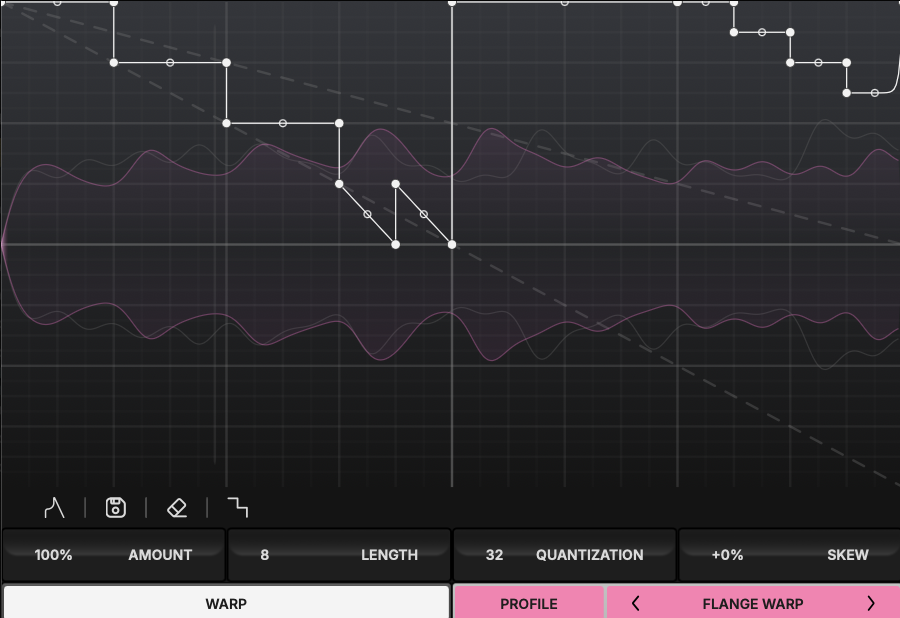
I want enough control to experiment deliberately, and HyperWarp gave me that fairly quickly. I also appreciated this in my Transit 2 review: a few adjustments can make a substantial difference. When I can hear that difference immediately, I’m much more inclined to keep trying things.
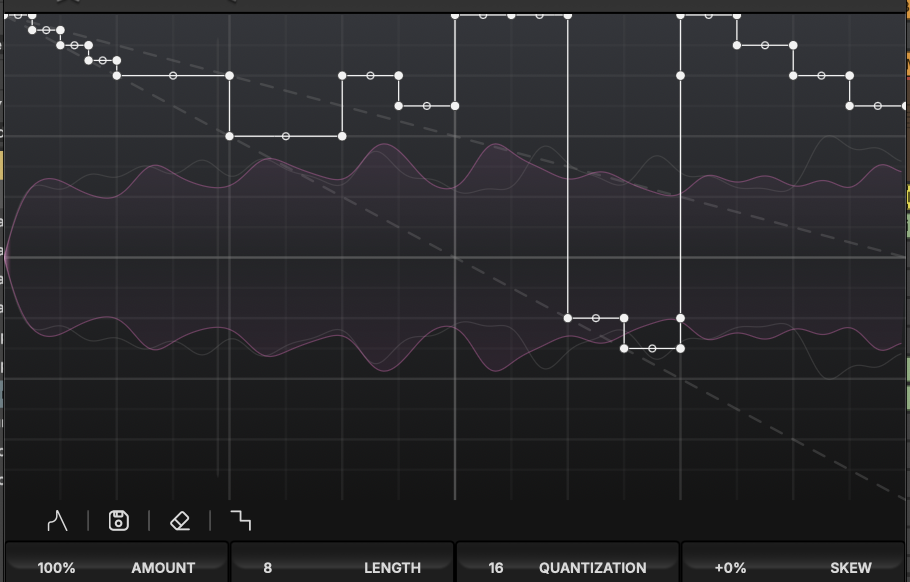
I also appreciated being able to resize the interface.
Sometimes I wanted a larger graph to work with; other times I wanted the plugin smaller so I could see the rest of my project. It’s a small detail, but I notice it when I use an effect repeatedly. I liked having that choice instead of accommodating one fixed window size.

I Kept Returning To Low Wet Settings
Anyone who’s followed my music for a while knows I make atmospheric, texture-heavy progressive and melodic house. I spend a lot of time on small details, including sounds you might not notice individually but would notice if you removed them. That’s generally what I want from granular processing. I’m looking for added texture without adding another prominent part to the arrangement.
HyperWarp became much more appealing to me when I started treating it that way.
Some presets make substantial changes, and I can see why someone doing aggressive bass design would enjoy experimenting with them. For my music, I kept turning the wet amount down. Around 10 to 15 percent was where a lot of the presets started giving me results I wanted to use.
I’d suggest doing that before deciding a preset is too much. A heavily processed version could be impressive on its own and still be something I had no interest in putting in my track. Turning it down changed that: I could hear the original part, with small repetitions and artifacts adding detail. Those were the settings I kept wanting to use.
I have a similar relationship with OTT.
Small amounts often work well for me, and I can quickly reach a setting I no longer like. With HyperWarp, the wet control became an important part of deciding whether a preset suited the song. I often ended up around 10 to 15 percent, though I still made that decision by listening to the complete mix.
This is the part I liked most about using HyperWarp. I could get additional detail from a sound I’d already chosen, without searching for another loop and then trying to make room for it. Adding samples is easy; deciding how many the song actually needs takes more consideration. I’d rather try getting something extra from an existing part before adding another one.
Pitch Is Where I Wanted Another Option

The pitch behavior is the part of granular processing I’ve always had the most mixed feelings about. I want unexpected results, because that’s often how I find a detail I wouldn’t have thought to create deliberately. I also want those results to sound right against the rest of the track. Those preferences can lead to a lot of editing.
I’ve spent an hour recording granular experiments, then gone back and selected enough fragments to add a few details to a four- or five-minute song. Some passages needed correcting in Melodyne, and others were easier to remove. I accepted that because I kept the fragments I liked enough to use. Still, I’d appreciate an option that reduced how often I had to make those corrections.
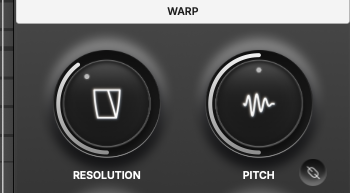
HyperWarp gave me some of the same pitch-related frustrations. Some artifacts sounded good on their own and less convincing against the harmony I was working with. When I kept the processing more controlled, I liked some of the sustained, resonant textures, although the results were also more predictable. For those sounds, predictability was fine; it was less appealing when I wanted a surprising fragment to edit into the track.
The pitch lock needs explaining accurately here. It snaps the Pitch control to whole-semitone intervals across a range of two octaves up or down, while pitch and playback speed can operate independently depending on the profile and settings. It doesn’t restrict the generated material to a chosen key or scale.
That’s the option I’d like to see added. I’d enjoy being able to experiment with unpredictable granular results while limiting the notes they introduce to ones that fit my track. As it stands, I still need to listen for unwanted pitch changes and decide whether to edit or correct them.

I’ll use HyperWarp for the subtle processing I liked, while continuing to use other plugins for more experimental work.
I Wanted A Faster Way To Recall Presets

My other complaint is one I notice more after spending time with a plugin: finding the presets I liked again. Some names didn’t tell me enough about the sound to help me remember them, so I wanted to make notes as I auditioned the collection. That’s a process I’d like the browser to help with. Once I’ve found something that suits my music, I want to mark it and move on.

In the early copy I tested, I couldn’t find the favorites or color-tagging functionality I’d hoped for. I was disappointed by that because I’ve appreciated similar options in other Baby Audio plugins. I might only use a fifth of HyperWarp’s presets regularly, or even fewer, and I’m fine with that. The ones I like could fit into a lot of my projects, which is exactly why I’d want to recall them quickly.
HyperWarp supports saving presets, so I can save my preferred versions under names I’ll remember. I’d still prefer a quick marker in the browser, especially when I’m auditioning a lot of settings and want to keep working on the song. The processing itself is easy to start using. I’d like recalling my preferred settings to be just as straightforward.
Where HyperWarp Fits In My Production
After a week with HyperWarp, the reason I’d keep using it is fairly specific: I liked what it did at restrained wet settings. It gave me small atmospheric details from sounds I was already working with, and I didn’t have to spend much time setting that up.
That’s enough to justify revisiting it in my progressive and melodic house projects.
I don’t need every profile or preset to suit me if I regularly use the ones that do.
I’d welcome better preset organization and a scale-locking option, because they’d help with the parts of granular processing I still find time-consuming. In the meantime, I’d suggest trying the demo on something from a project you’re actually working on. Turn the wet amount down and listen to the result alongside the rest of the music. That’s how I found the applications I liked most, and it’s how I’d evaluate whether HyperWarp belongs in your own plugin collection.

Will Vance is a professional music producer who has been involved in the industry for the better part of a decade and has been the managing editor at Magnetic Magazine since mid-2022. In that time period, he has published thousands of articles on music production, industry think pieces and educational articles about the music industry. Over the last decade as a professional music producer, Will Vance has also ran multiple successful and highly respected record labels in the industry, including Where The Heart Is Records as well as having launched a new label with a focus on community through Magnetic Magazine. When not running these labels or producing his own music, Vance is likely writing for other top industry sites like Waves or the Hyperbits Masterclass or working on his upcoming book on mindfulness in music production. On the rare chance he's not thinking about music production, he's probably running a game of Dungeons and Dragons with his friends which he has been the dungeon master for for many years.






![How It Was Made: Lang Father i(Junkyard Dog) [Welofi]](https://magneticmag.com/wp-content/uploads/2026/10/Press-Pic_2-1024x576.jpg)