Credit: Dana Trippe
Producer and multi-instrumentalist Wrabel breaks down the production behind Wrabel’s up above, the title track from his forthcoming album due February 13, 2026 on Nettwerk. The song was co-produced by Warble alongside Wrabel and Austin Ward, with final mixing by Damian Taylor, known for his work with Björk, Frou Frou, The Prodigy, and Arcade Fire.
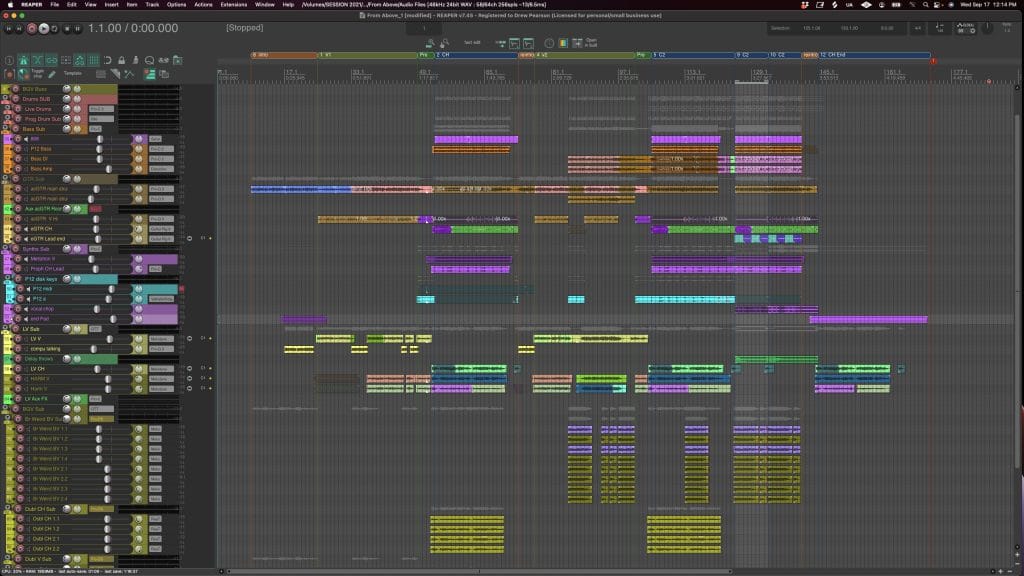
Written largely at Wrabel’s coffee table, up above explores surreal imagery and existential reflection through a blend of intimate songwriting and experimental sound design. Wrabel helped shape the song’s expansive energy using granular processing, texture-driven synths, and a balance of digital and organic tones that mirror the song’s lyrical themes. The result is a production that feels equally delicate and cinematic, grounded in emotion but carried by constant motion.
Below, Wrabel shares the key tools and techniques that helped define the sound of up above, including Reaper’s native time-stretching algorithm, FabFilter’s modulation tools, and some unconventional approaches to delay, filtering, and rhythmic design.
Reaper’s Time-Stretch Algorithm – “ReaReaRea”

The DAW I use is called Reaper and like most DAWs it has different pitch and time stretching algorithms. One of my favorites is called “ReaReaRea.” It will basically chop the audio, either randomly or on the grid, and repeat the chopped audio at original speed until the next slice. If you time stretch the audio clip longer, then it will create a bunch of repeating rhythmic chops, but if you shorten it, then the tails of every slice get clipped off. It’s similar to Ableton’s “Beat” algorithm if you put markers just on the grid lines.
This technique was used to create the vocal chops in the intro of the song. We took the lead chorus vocals of the song, set the timestretch algorithm (ReaReaRea) to repeat eighth notes and played the chorus back at 5x the speed. The effect is a seemingly random eighth note from somewhere in the chorus being played back every eighth note. We also used Soundtoys AlterBoy and some Kilohearts bitcrush to give it that broken speak-and-spell effect.
This technique is great for the discovery part of music making. It’s not necessarily generative music making, but you don’t really know what the algorithm is going to do until you try it. Whatever comes out the other end is almost certainly something you wouldn’t have come up with if you just started chopping the sample up with a more conventional method. It can be helpful in pretty much any genre that has electronic elements.
Native Instruments Guitar Rig
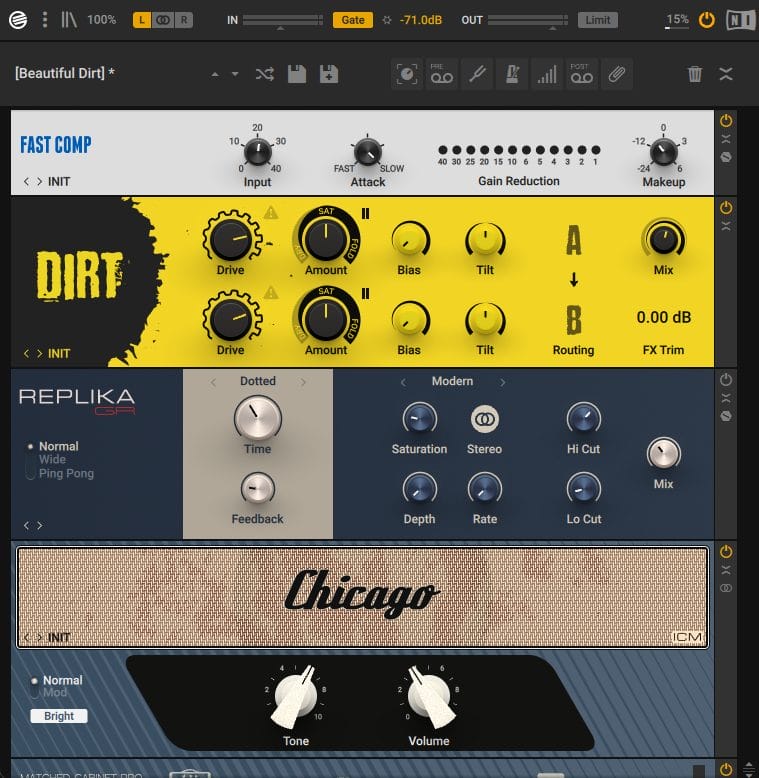
GuitarRig is a guitar amp and fx emulation plugin. It has a huge selection of classic guitar amps, pedal fx, and mixing fx all available in one plugin. It can do anything from classic rock guitar tones to verbed-out ambient tones that barely sound like a guitar anymore.
We used this plugin for the lead guitar tone toward the end of the song. There is a delay that comes with GuitarRig called Replika and that is really at the heart of this sound. The delay was set to a dotted eighth note and mixed almost as loud as the original signal. Mixing the delay so loud creates an effect where you can’t really tell if a note was played by the guitarist or it was a repeat of the delay. It all sounds like one line. The Edge, the guitarist in the band U2, popularized this type of delay technique, and that’s the sound we were going for here.
This technique can be achieved with any delay. It’s about mixing the delay as loud as the original signal and then playing off of the repeats in a musical way. For example: try setting a delay to a dotted eighth note and then play a line of consistent eighth notes through it. What comes out sounds much more complicated and interesting than what you put in. It sounds like you’re playing this crazy sixteenth note pattern.
FabFilter Volcano
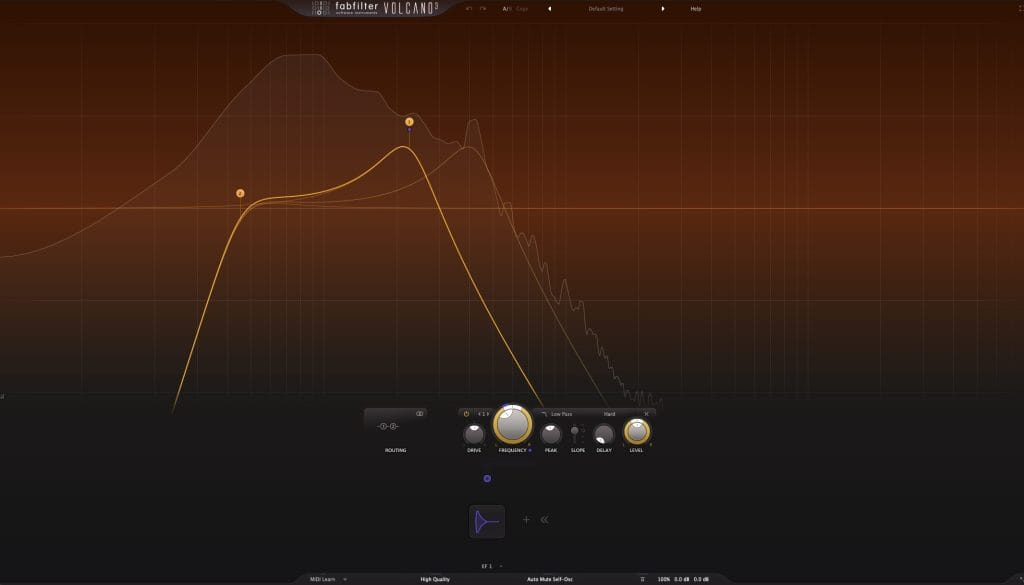
Volcano is a super versatile filter plugin. It can be used for high-pass, low-pass and band-pass filters, as well as an EQ and saturation plugin. You can have up to four filters in this one plugin. In addition to that the modulation section allows you to adjust any parameter in the plugin with LFOs, envelope followers, and other sources.
We used this plugin to give the live bass a more synthy sound in the verses. We put a low-pass filter with some resonance set to around 200 Hz and then used an envelope follower to modulate frequency. Every time a bass note was played the filter would open up creating almost an auto-wah type of sound. It has the effect of making the live bass sound almost like a synth bass. It helps to have more high-end frequency information before the filter so the bass going in was pretty distorted.
This technique would fit well in pop, funk, and indie genres. The modulation section in the FabFilter plugins is super powerful and it’s definitely something you should think about reaching for before resorting to automation. For example if you need to automate several parameters at once, you can assign all the parameters to one macro and then just automate that macro.
Xfer LFO Tool
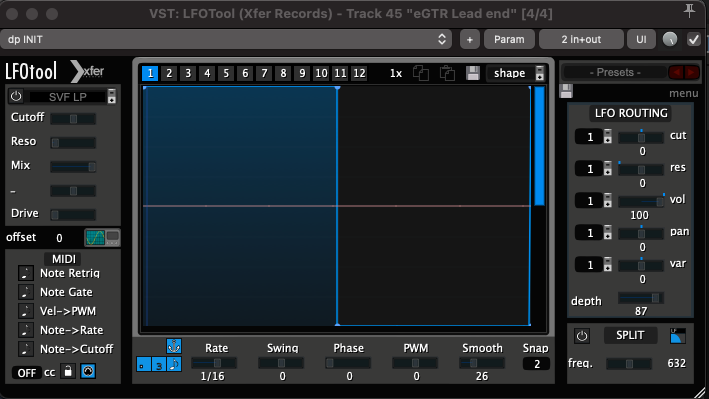
LFO Tool allows you to automate volume, pan, and a great-sounding filter with up to eight looping drawable LFOs. You can think of it as a small clip of automation that loops over and over. It’s an older plugin but I still use it all the time because the interface is so streamlined.
We used LFO Tool on a few tracks but you can really hear it in the lead guitar line. The guitar sounds choppy for one bar before the chord progression starts over. That’s LFO Tool, drawn like a square wave and automated to fade in every eight bars. There’s a slider on LFO Tool called “depth” and it will control the amount of effect the LFO has on the sound. Almost like a macro for all the sliders on the right side of the plugin.
This plugin is great for injecting some rhythm into a track. You can use it as a type of ducking or sidechain sound, as a tremolo, for rhythmic panning, or rhythmic filtering. Here’s something to try. Play a legato synth bass line, put LFO Tool as the last plugin, draw a sawtooth shape and assign it to the filter in the plugin. Set the rate to eighth notes and you have a rolling bassline without using an arp or having to draw in a ton of eighth notes.
Quick Fire Tips for Making Music
#1
• You can automate the glide of a polysynth (like Serum) to make some chords gradually slide into pitch without making the whole progression into a pitch-gliding mess.
#2
• Don’t forget FabFilter Q4 is also a multiband compressor. Instead of EQ-ing out a frequency, you can duck the frequency whenever it gets too loud.
#3
• Automating the size of a reverb (such as Valhalla VintageVerb) can give it a broken, warbly sound. It alters the pitch of the reverb without altering the pitch of the original signal.

Will Vance is a professional music producer who has been involved in the industry for the better part of a decade and has been the managing editor at Magnetic Magazine since mid-2022. In that time period, he has published thousands of articles on music production, industry think pieces and educational articles about the music industry. Over the last decade as a professional music producer, Will Vance has also ran multiple successful and highly respected record labels in the industry, including Where The Heart Is Records as well as having launched a new label with a focus on community through Magnetic Magazine. When not running these labels or producing his own music, Vance is likely writing for other top industry sites like Waves or the Hyperbits Masterclass or working on his upcoming book on mindfulness in music production. On the rare chance he's not thinking about music production, he's probably running a game of Dungeons and Dragons with his friends which he has been the dungeon master for for many years.