
J:DC is a future star in the techno space..
A rising force in the UK underground electronic scene, has just dropped their highly anticipated “Respite EP.” This release marks a significant step in J:DC’s evolving sound, blending euphoric energy with emotive depths. Drawing from years of experience in London’s iconic club venues and Sheffield’s raw techno scene, J:DC crafts a unique auditory experience.
“Respite” features a powerful kick drum, atmospheric chords, and a captivating female vocal sample, balancing intense build-ups with moments of serene release. Known for a refined taste in house, techno, and trance, J:DC’s journey from venues like XOYO to founding Factor 50 showcases a dedication to pushing boundaries and supporting emerging talent. We asked the debut talent to talk us through his process on the new single below..

Ableton Wavetable

The main rolling synth that runs throughout Respite was built using Ableton’s Wavetable. It was one of the first synths I explored when I started producing, and I’ve always found it intuitive and capable of creating rich, textured sounds. I really like how flexible it is, especially when it comes to modulating parameters through the matrix and MIDI tabs. Like many producers, I’m often chasing that happy accident, and Wavetable makes it easy to explore and stumble into interesting results.
The patch is made from two Pulse Waves, with the first one pitched up seven semitones to give it that classic minor feel. The filter is modulated, and the waves themselves are being shaped by two LFOs to add subtle movement and texture. Since the synth runs through most of the track, I put a lot of attention into the MIDI – particularly velocity and pitch – to keep things from feeling static. I used Ableton’s Chord device to add extra notes and build a kind of double minor chord, which helped give it a lush, harmonic feel.
Because the sound isn’t too complex at its core, I relied on automation to keep it feeling alive. I focused on adjusting the attack, decay, and release of the first envelope over time to give the impression that the chord was evolving as the track progressed. I usually like layering synths to create something more bespoke, but in this case the sound felt thick enough on its own. I did experiment with layers, but nothing sat right in the mix – the spectrum just got too busy. Sometimes it’s better to keep things simple and focus on getting the most out of fewer, fuller sounds.
Valhalla Supermassive

To add space and texture to the rolling synth, I used two instances of Valhalla Supermassive – one directly in the main chain and another on a return track. Supermassive is a powerful (and free!) plugin that’s perfect for huge reverbs, harmonic echoes, and those spacey, drifting textures. Like all of the Valhalla plugins, the interface is really straightforward, which makes it easy to dial in what you need without getting bogged down in too many menus.
On the main chain, I used the ‘Slow Flange’ preset and tweaked a few parameters to better suit the tone of the synth. I tend to scroll through presets until something catches my ear, then shape it from there to suit the track. The return track was used more as a transitional FX layer, running the ‘Half Note Spray’ preset. I automated the return level toward the end of each phrase and into the breakdowns, letting it rise and build tension. It’s one of my favorite plugins for teasing out harmonics that might otherwise stay hidden – genuinely impressive for something that’s free.
Lately, I’ve started experimenting with Supermassive on percussion buses or groups of sounds that naturally work together. It’s great for gluing sounds and adding depth, but it’s definitely something to use with intention. Push the mix knob too far and it can easily flood the spectrum or wash out the focus. Still, when used subtly, it can bring a real sense of cohesion. I also see huge potential in using it to create evolving soundscapes by resampling even basic waveforms through it.
Soundtoys Microshift
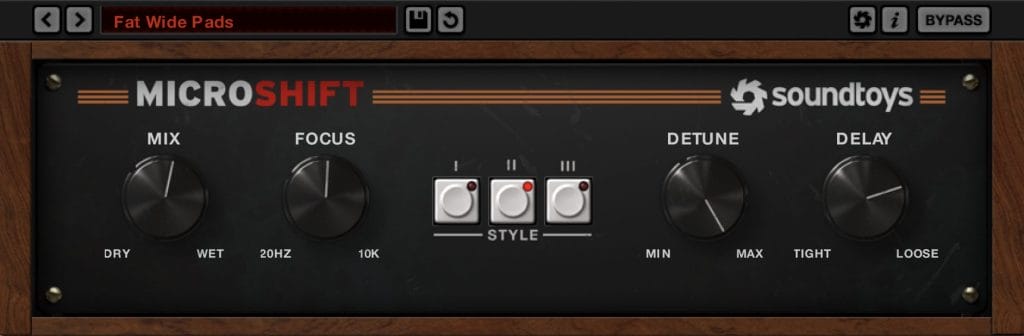
Soundtoys MicroShift is one of those plugins I throw on when a sound needs just a little more space or presence. It’s a stereo widening tool that uses subtle pitch shifting and delay to push sounds out to the sides without losing focus in the mix. What I like about it is how effortless it feels, just a couple of knobs, but really effective results.
In Respite, I used MicroShift on both the pads and a vox-style string layer to help them sit wider in the mix without overpowering anything. I started with the Fat Wide Pads preset, which already had a nice open feel, and then pushed the detune all the way up for extra movement. I also loosened the delay slightly to keep things feeling fluid and less locked in rhythmically. The dry/wet was set around 55%, which gave enough width to feel immersive but still kept the core of the sound centered. It worked especially well in the breakdowns, where space opens up and those elements needed to feel a bit more expansive.
For producers working in ambient or electronic spaces, MicroShift is a great tool for adding width and depth without over-processing a sound. It works especially well on pads, strings, and even vocals – I’ve found it gives vocals a really natural sense of space, almost like an analog chorus but with more control. There’s a subtle thickness it adds that feels organic rather than artificial. Just be mindful of how it interacts with reverb and delay; it’s one of those effects where a little goes a long way. Used thoughtfully, it can really elevate the stereo image and bring out dimension in softer, more atmospheric mixes.
Soothe 2

Soothe2 is one of those plugins that quietly transforms your mix without making a fuss and at this point, I use it in every project. It’s a dynamic resonance suppressor that reacts in real time to tame harsh or boxy frequencies, especially in the mids and highs. What I love about it is how transparent it sounds; instead of carving out static EQ notches, it adapts to the signal and only cuts when it needs to. The interface is really clean and intuitive, and once you’ve used it a few times, it becomes second nature to reach for it.
If you’re working with layered synths, vocals, or detailed percussion, Soothe2 can be a huge help for keeping things smooth and balanced. I’ve found it especially useful when stacking vocal layers – the ‘Vocal De-Harsh’ preset is a solid starting point, and it helps tame any sharp frequencies without stripping away the emotion or tone. It also works surprisingly well on hi-hats or other bright percussion where you want presence without harshness. Like most dynamic tools, it’s best used with a bit of restraint, but when dialed in right, it’s one of the cleanest ways to add clarity and control without losing warmth.
One thing I’ve learned with Soothe2 is how useful it can be as a preventative tool, not just something you reach for when a mix sounds harsh. I’ll often throw it on early in the chain when I’m working with layered or resampled elements, just to keep any resonant build-up in check before it becomes a problem. Even with subtle settings, it helps save time later in the mix by keeping things smooth from the start. It’s definitely one of those plugins where a light touch goes a long way, and once it’s part of your workflow, it’s hard to go without.
Quick Fire Tips For Making This Genre
Tip #1
Start with one strong, evolving synth and build your track around it – automate shape, pitch, and envelope to give it movement. Wavetable’s modulation and chord shaping make it easy to create rich, rolling textures that feel alive.
Tip #2
Use width to your advantage, but don’t overdo it — MicroShift on pads or vocal textures can add presence without crowding the mix. Push the detune, keep the dry/wet in check, and let the sides breathe.
Tip #3
Tame harshness early with subtle tools like Soothe2 — especially when stacking vocals or layering hi-hats. A light touch on group buses can save you from heavy-handed EQ later on.
Connect with J:DC: Spotify |


![PREMIERE: Discognition & Vellichor – Lillian (pørtl Remix) [Magnetic Magazine Recordings]](https://magneticmag.com/wp-content/uploads/2026/04/portl-artist-image-04.jpg)

![[PREMIERE] Ben Pierre Reworks Vellichor & Discognition’s “Lillian” for Magnetic Magazine Recordings](https://magneticmag.com/wp-content/uploads/2026/04/Screenshot-2026-02-20-at-9.55.55-AM.jpg)