Table of Contents
I’ve been following Brooklyn’s Local Dialect, a DJ duo known for progressive house and melodic techno, releasing on labels like Zero Three and many others for years. They truly embody the idea of hard work paying off, and while that might sound corny and a bit on the nose, it’s true. These days, so much attention is put on producers going viral on TikTok and hoping to explode into infamy, and many don’t focus on consistently producing quality tracks and putting on top-notch performances. The Local Dialect Boys certainly do, though, and after years of grinding, they are finally reaping the benefits.
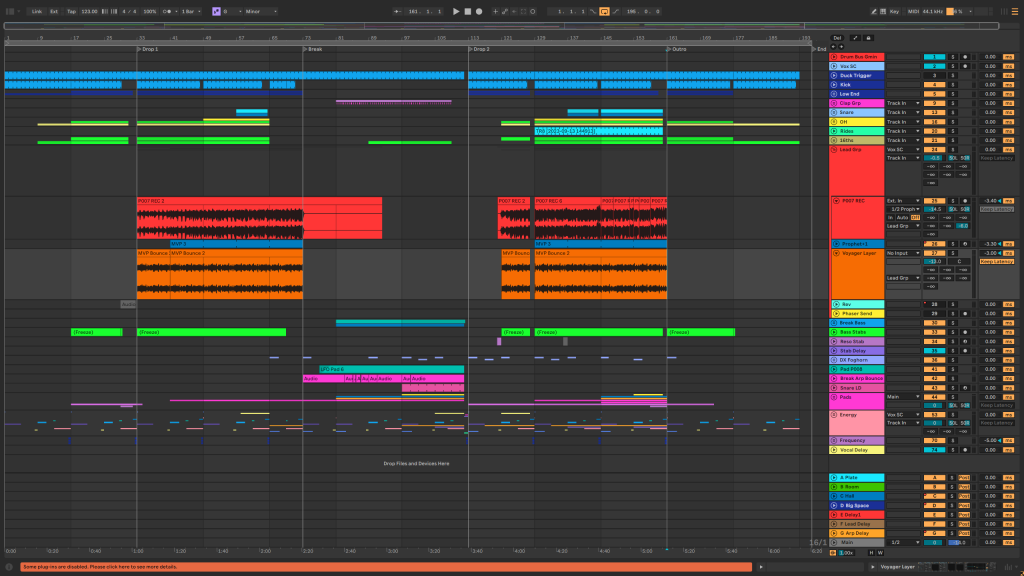
A perfect continuation of their journey is the launch of their new label, Translations. This label aims to be a platform for creative expression for themselves and other artists, going beyond the typical label ecosystem that many producers are growing tired of. It’s already gaining momentum, and we figured there was no better time to invite these guys for the latest iteration of “How It Was Made,” featuring Local Dialect – Frequency, one of my favorite melodic techno tunes this month and a master class in production. So, let’s dive into the plugins they used, the tools they leaned on in the studio, and how this track came together.
Prophet 06
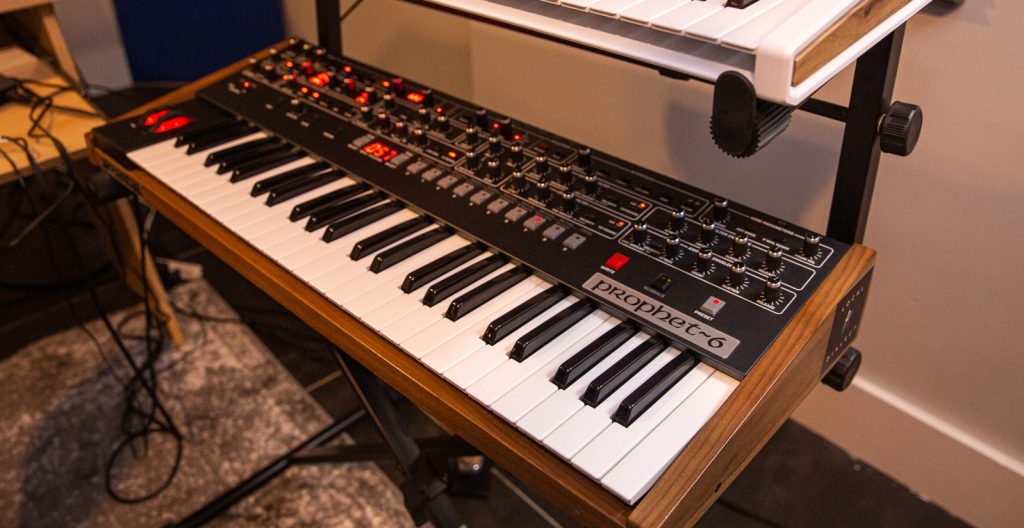
This is the Prophet 6, an incredible analog polysynth from Dave Smith. We make most of our melodic leads with this beast, and so we have a number of presets that we’ve accumulated over the years. We love two things about it – it sounds great with a minimal amount of programming, and it’s effortlessly playbale because of its one-knob-per-function layout. There are no screens (except small ones for the FX), and something about the keyboard and the knobs just feel right.
The primary lead layer in Frequency was made with the Prophet. The sound was a classic of ours, two oscillators with the first synced to the second, which is an octave higher. We added some saturation (Soundtoys Decapitator is a favorite, more on that later) as well as some EQ and compression. When we record the synth we usually perform 3-4 takes, running through the whole song arrangement while “playing” parameters like the filter cutoff, envelope decay and sustain, as well as the mod wheel which in this case was mapped to an filter LFO amount. When using the mod wheel we also modulate the LFO speed to add an FM-style character.
All of these tricks can be recreated without having to buy an analog synth – U-he makes an awesome VST called Repro-5 that is modeled after the Prophet. We actually used Repro-5 in this track for an additional layer on the lead that sits an octave higher. This is a good trick for increasing energy later on in the track.
Both layers are grouped together and sent to a Soundtoys Echoboy 1/8th dotted delay as well as a reverb – in this case it was Valhalla Supermassive (which is free!) – and we modulate the reverb send amount up to “space it out” as it enters the breakdown section.
Valhalla Supermassive
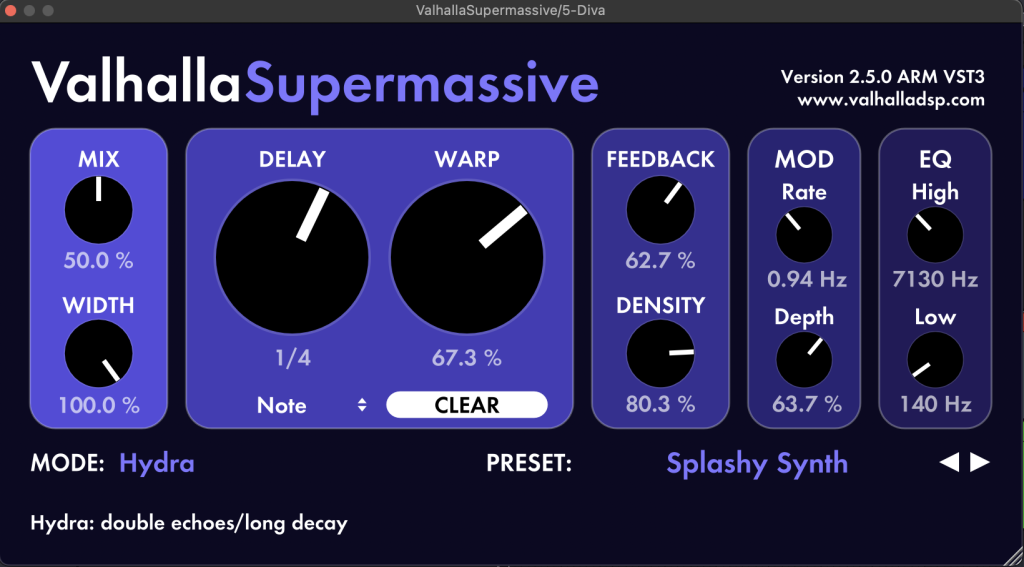
Valhalla supermassive is an incredible reverb/delay plugin. It definitely lives up to its name – it can create massive spaces or drown any source signal in an ocean of reverb. It has the ability to do some classic sounds too – we really love the “Dotted 8th Chorus Echo” preset.
We used Supermassive mainly as a transitional tool in Frequency. We have it on the main lead sound, and we start the track with it dialed up pretty high, swallowing up the main synth. Then we automated the mix amount down as the lead begins to grow and the energy of the track builds. At the end, we also use the same trick in reverse to make the lead feel like it’s pulling away from the front of the mix. We used a preset that we love for this purpose called “Splashy Synth”, which is a delay + reverb combo that has feedback and depth dialed up pretty high.
This plugin is aptly named, so don’t overthink it and just dive right into some of the awesome presets when you need a big space. Designing things from scratch is never a bad idea but the presets in all Valhalla plugins are really great starting points. It’s also great for transitions – try throwing it onto an element that you want to move into the background and automate the mix amount up to taste.
Soundtoys Decapitator
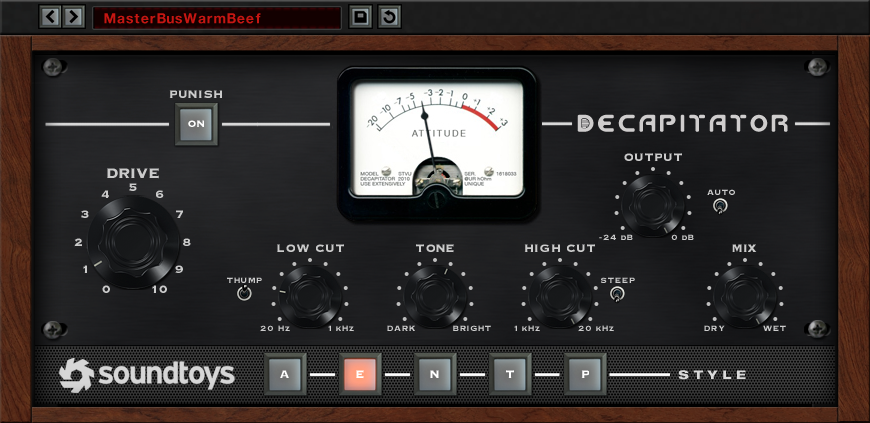
Decapitator is one of the best saturation/distortion plugins on the market. It is a fairly simple plugin to use, and it provides everything from subtle color to full on audio destruction (try the punish button!). It also has five different flavors of analog color to choose from, with each of them providing an emulation of a familiar analog character.
Decap always finds its way into our projects, it’s probably our most used saturation plugin. For us, it has two major uses – adding color or increasing perceived loudness. How we use the plugin depends on the goal. In this track, we used it liberally on the drums for both loudness and color – the A or E settings usually give us the tone that we like for our hi hats. We usually land on A or T for our basses, and in this track we used the T setting on the bass to give it some extra power. We applied the heaviest distortion on the bass hits during the second drop, turning the drive all the way into the red on the meter to get as much color as we could before it started to break apart.
When trying to add to perceived volume, we stick to a lower amount of saturation (less drive). When adding color – there are no rules! Try to learn the tone of each of the different saturation options – each adds its own unique flavor to the source signal. A good rule of thumb is to always match the input level to the output level – that means that if your source signal is hitting -10dB before putting on Decapitator, it should also be hitting -10dB after applying Decapitator. It’s easy to think that the processing you’re applying is making a big difference when in fact you’re just making the signal louder. Human ears are very easily tricked by volume and this is a good way to avoid that illusion.
Oeksound Soothe 2
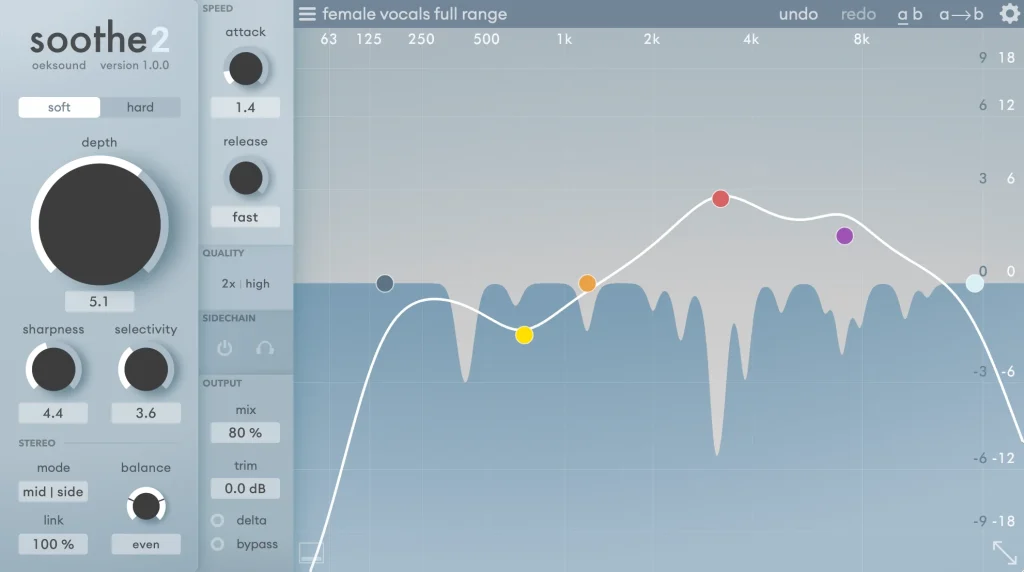
Oeksound Soothe is functionally a dynamic EQ that automatically detects harsh frequencies and suppresses them with minimal input from the user. All you have to do is identify the general frequency range that you want to be treated, and Soothe will pick out the specific frequencies to reduce on its own. You can control how much reduction is applied and tweak a few parameters, but you never have to zero-in on the specific frequency yourself which is a huge time-saver.
We generally use Soothe later on in a signal chain after we’ve already applied some eq and compression. We’ll often start from a preset and adjust. For example, the “Harsh Hi-hat” preset is useful for taming drums in the 7-10kHz region. There’s also a “Side Clarity” preset that’s useful for cleaning up side information, for example if we want a lot of reverb on a synth sound but don’t want it taking up too much room in the mix.
Use Soothe while mixing to get each individual element the last 5% of the way there, or on a bus to clean up multiple sounds together. Try tweaking the sharpness knob – more sharpness is good for targeting specific narrow frequency bands like in a drum sound, while less sharpness is good for smoother, more transparent taming on, say, a synth or bass. Also try the mid-side bias – often the harsh frequencies are more prominent on either the mid or the side channel and not the entire signal!
Quick Fire Tips On Making Melodic Techno
Tip #1: Kick + Bass is the foundation to every banger. A simple, powerful low end will make or break your club track. Keep basslines simple and the sub layer fully mono.
Tip #2: Focus on the hook. The foundation of many melodic techno tracks is similar, what sets apart the memorable ones is a motif or melody that gets stuck in your head.
Tip #3: Be careful with your drum layers. Don’t get lost layering 3 or 4 hi-hats – just focus on picking the right samples that fill out the space around your synths and power the groove. Less is more here.
Tip #4: Automation is the best way to keep interest. Focus on major automation over a longer period (lead fading in or out, drums filtering, etc.) and then follow up with secondary automation on individual elements or smaller touches. A little goes a long way.
Tip #5: Melodic Techno is whatever you want it to be. Just focus on making a song that is true to you, don’t worry about genre guidelines or requirements.
Will Vance is a professional music producer who has been involved in the industry for the better part of a decade and has been the managing editor at Magnetic Magazine since mid-2022. In that time period, he has published thousands of articles on music production, industry think pieces and educational articles about the music industry. Over the last decade as a professional music producer, Will Vance has also ran multiple successful and highly respected record labels in the industry, including Where The Heart Is Records as well as having launched a new label with a focus on community through Magnetic Magazine. When not running these labels or producing his own music, Vance is likely writing for other top industry sites like Waves or the Hyperbits Masterclass or working on his upcoming book on mindfulness in music production. On the rare chance he's not thinking about music production, he's probably running a game of Dungeons and Dragons with his friends which he has been the dungeon master for for many years.